Exploring OneGraph
Disclaimer: This article is from 2019 and OneGraph was first acquired by Netlify and since then was shut down. I only keep the article up for educational and historical reasons.
Back in 2017, just 2 days before my first conference talk over at ReactiveConf, I had the chance to meet Sean Grove - and learn about OneGraph.
He gave a talk on OneGraph at Vienna's React Meetup that got me super excited. If you haven't already, go and watch it!
The idea behind OneGraph was simple. You get a GraphQL API that connects multiple different services such as YouTube, Twitter, GitHub and many more.
With a single GraphQL query you're able to fetch a YouTube video, the corresponding channel and all the tweets that channel posted on Twitter (if an account was linked of course). One can basically fetch data from any service with just one single call-replacing dozens of separate REST calls.
Last week, I finally had time to try it all first hand. My goal was to build a simple app that includes at least 2 services, requires authentication and yet is somewhat related to my work and interests. I checked OneGraph's amazing graphiql-explorer add-on for GraphiQL and found that they also wrap npm and even BundlePhobia.
The Idea
Then came the idea: a service similar to npm's or yarn's package information page which includes downloads count, available versions, bundle size and a Readme as well as some statistics from GitHub if a repository is linked.
Background: I frequently check package information such as its Readme, versions, bundle size, dependencies and raw files.
Problem: This requires me to open 4 different services and many more clicks to see the actual results. The services are GitHub, BundlePhobia, npm and unpkg. The idea was to have it all with a single click including direct links to all relevant services if I'd ever need more details.
Now we have the idea. I'd like to explain, step by step, how I achieve implementing the idea in just a couple of hours.
OneGraph in 10 Minutes
Without any knowledge, I was able to bootstrap my OneGraph app in 10 minutes following 3 easy steps:
- Go to OneGraph and register or log in.
- Create a new app to receive an
App Idwhich is later required to connect the client. - Switch to the Data Explorer tab and open the Explorer. Now just explore all possible queries and compose your final query without typing a single letter.
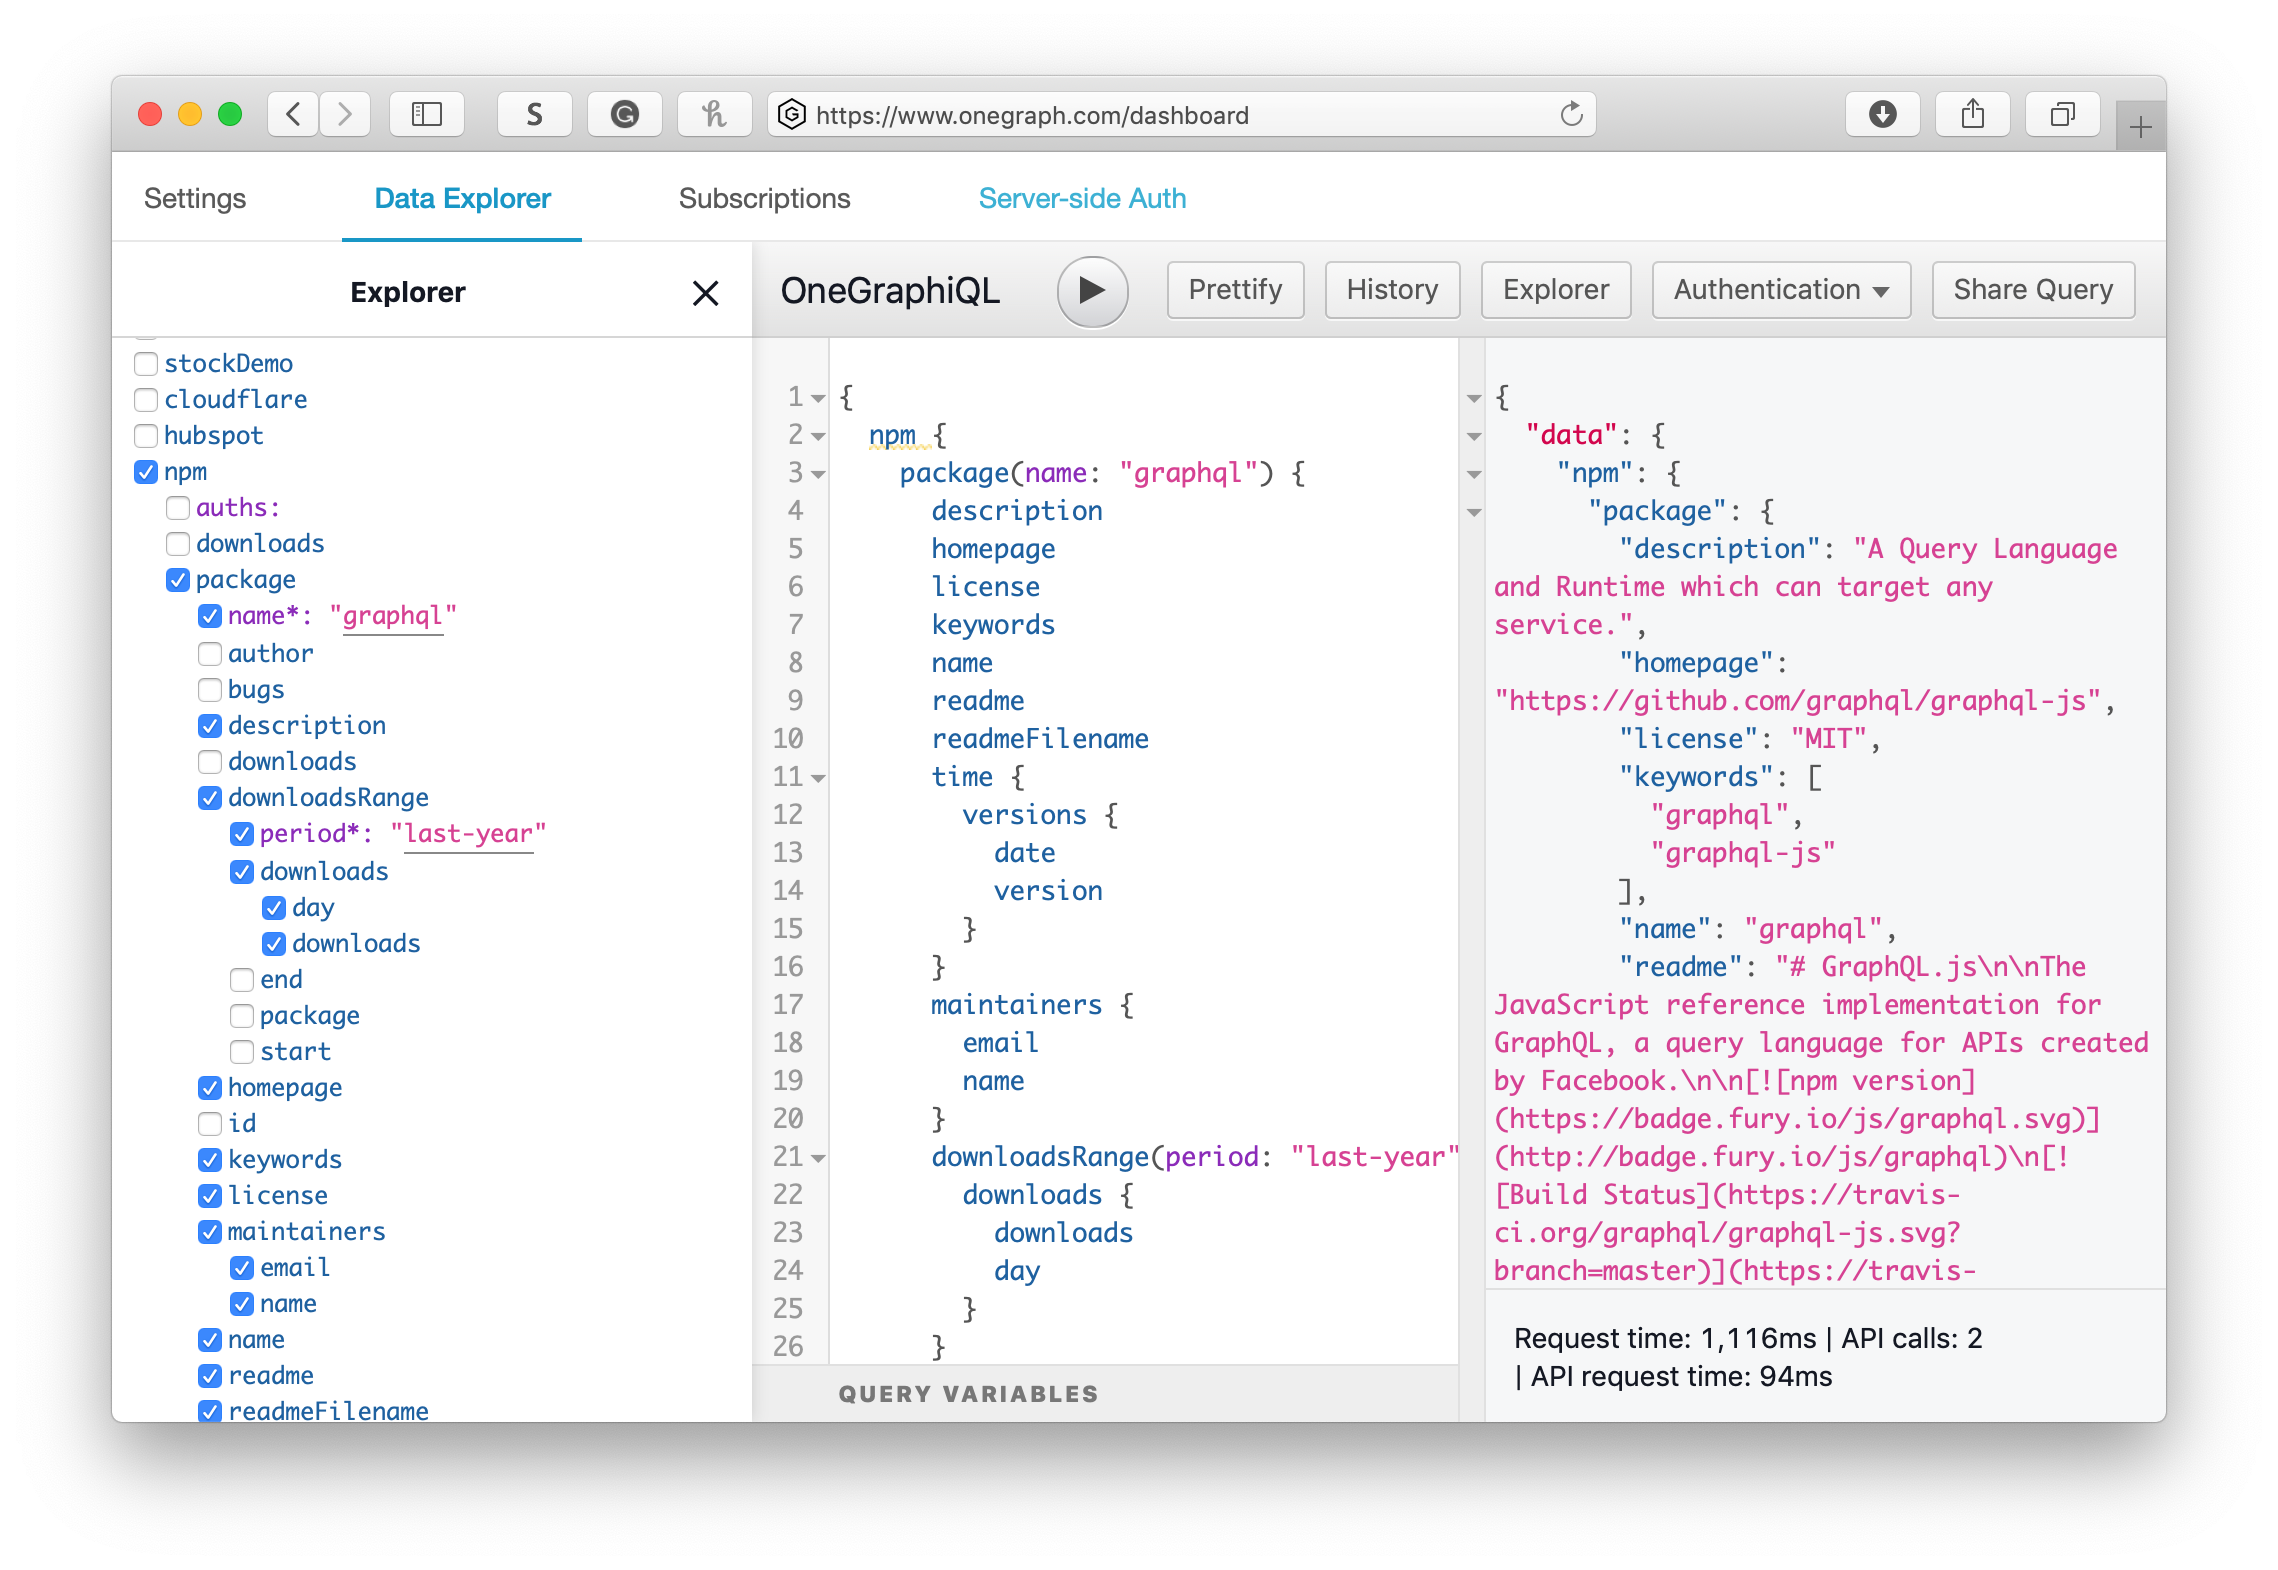
A quick example of how the explorer add-on and the final query looks like
Building the client
Now that I had the backend ready, I sat down and build a simple app using React and Next as a framework. I choose Apollo as my GraphQL client and store as well as Fela for CSS in JS styling. The download graphs are rendered using react-vis, the Readme file is parsed and rendered using react-markdown with a custom set of renderers copying the visual appearance of GitHub's Markdown, including syntax highlighting. I eventually open sourced those.
Thanks to Next and Apollo, the app even renders and prefetches available data on the server. Thus, even without JavaScript, we can get basic npm statistics and the Readme.
In order to connect OneGraph and Apollo, all I had to do was passing the OneGraph URL, including my App Id, to the HttpLink constructor. Now running the query I composed using OneGraph's GraphiQL, I was able to get quite a bunch of information from npm and BundlePhobia already.
Authentication with GitHub
The only missing piece was the data from GitHub which requires authenticating with GitHub first. I was getting nervous, because I really dislike everything that's related to authentication and immediately feel uncomfortable implementing that. Luckily, OneGraph got me covered providing a JavaScript library called onegraph-auth.
Apart from login and logout functions, it provides a method to get the required request headers which set the Authentication header. No sooner said than done, I finally got all the GitHub data. My simple app turned into a service providing extensive package information with one click!
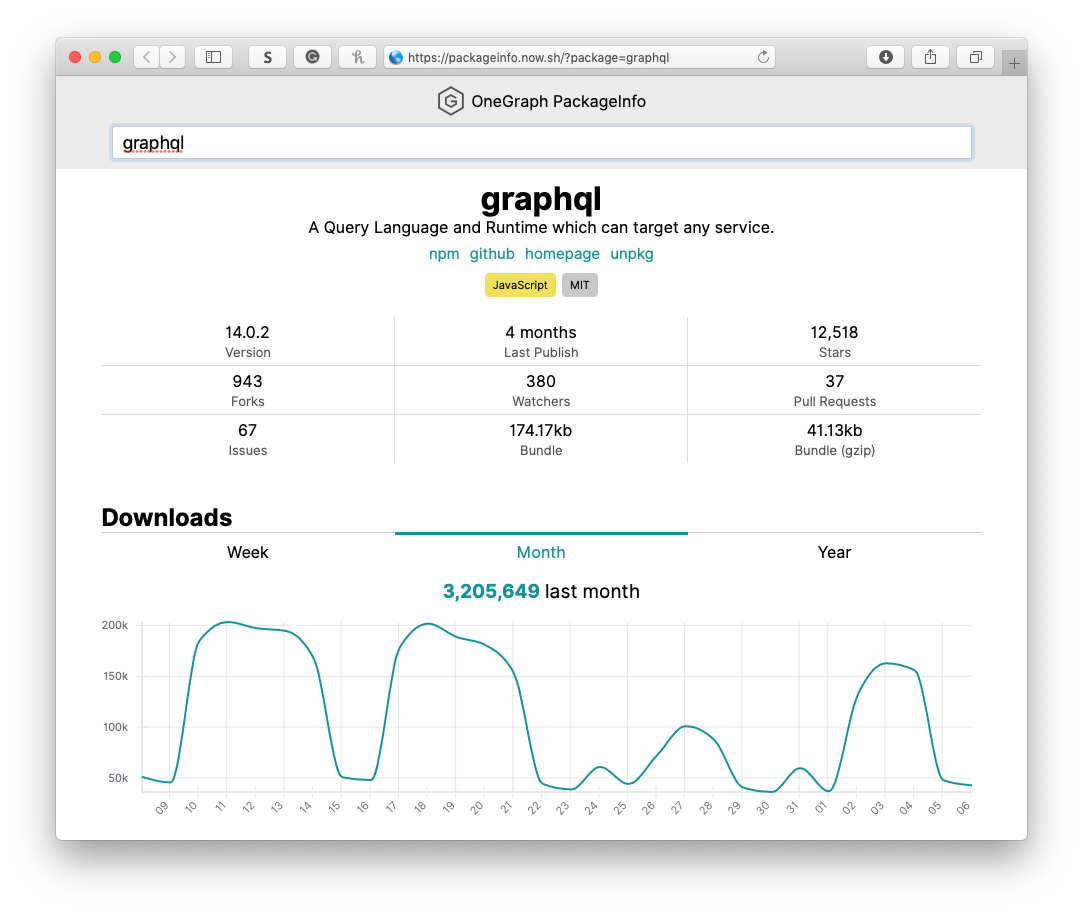
Check it out at https://packageinfo.now.sh.
Note: It might take some initial boot up time as this service is hosted on a free Now account and automatically shuts down the server after some idle time.
react-onegraph
While improving the app to show one's GitHub login status as well as adding support for server-side rendering, I had some issues using the onegraph-auth library together with React and Apollo.
- It only works on the client as the authentication process requires the global window object to check the auth status of a certain service. While that's not a problem itself, I had to make sure that the OneGraphAuth instance was only instantiated after the app was mounted.
- The real challenge was keeping the status in sync making sure the app re-renders on changes. This was especially hard since Apollo does not refetch if e.g. the headers change.
As I ended up using a repeated pattern, I set out to create some React bindings providing convenient components using React's new Context API (thus requiring React > 16.3) that'd handle the whole authentication and re-rendering process.
All we have to do is to wrap your app with an AuthProvider component passing the OneGraph App Id. Then we can consume the status, login/logout functions and headers everywhere. It also supports React's new useContext hook.
You can find it on GitHub and it's called react-onegraph.
Conclusion
In just a couple of hours, I was able to build a cool little app showing detailed information for any npm package using just a single OneGraph query.
If you use react-onegraph, setting everything up is super simple and straight-forward.
I especially loved the experience exploring all the possibilities with OneGraph's Explorer without looking up any API reference.