Using an iPhone as a Mac Webcam
Important Note: This post is from 2020 and pretty much outdated. Nowadays we can simply use the new continuity camera feature.
Disclaimer: This post becomes quite technical at some point where we're using developer tools such as a terminal and Xcode. We also fiddle with security mechanisms, so try it at your own risk!
If you're working from home due to Corona, chances are that you're participating in way more online meetings than you'd usually do. I've been working remotely for almost 2 years now and the number of online meetings has grown rapidly.
While meeting online is quite effective, one can quickly miss the in-person interaction; especially when you don't have an active webcam. I usually use a single big display to work on, so my Macbook is closed and I can't use its built-in webcam, which has a bad quality anyway.
I already considered buying an external webcam, when my friend and co-worker Daniel told me about his experiments with OBS and his iPhone camera. After some research, we found an article by Josh Spicer who used OBS and obs-mac-virtualcam to utilize his old iPhone as a mac webcam.
Since the article already is a couple of months old and outdated to some degree, I decided to write my own blog post about it! We're also not enrolled in the Apple Developer Program which lead to some extra work on our side.
OBS Setup
First of all, we need to setup OBS, so we can access our phone screen. The fastest way is to download the installer.
Once installed, open the app and choose the default settings.
Now, in order to see our phone screen, we need to add a Video Capture Device in the Sources Tab at the bottom.
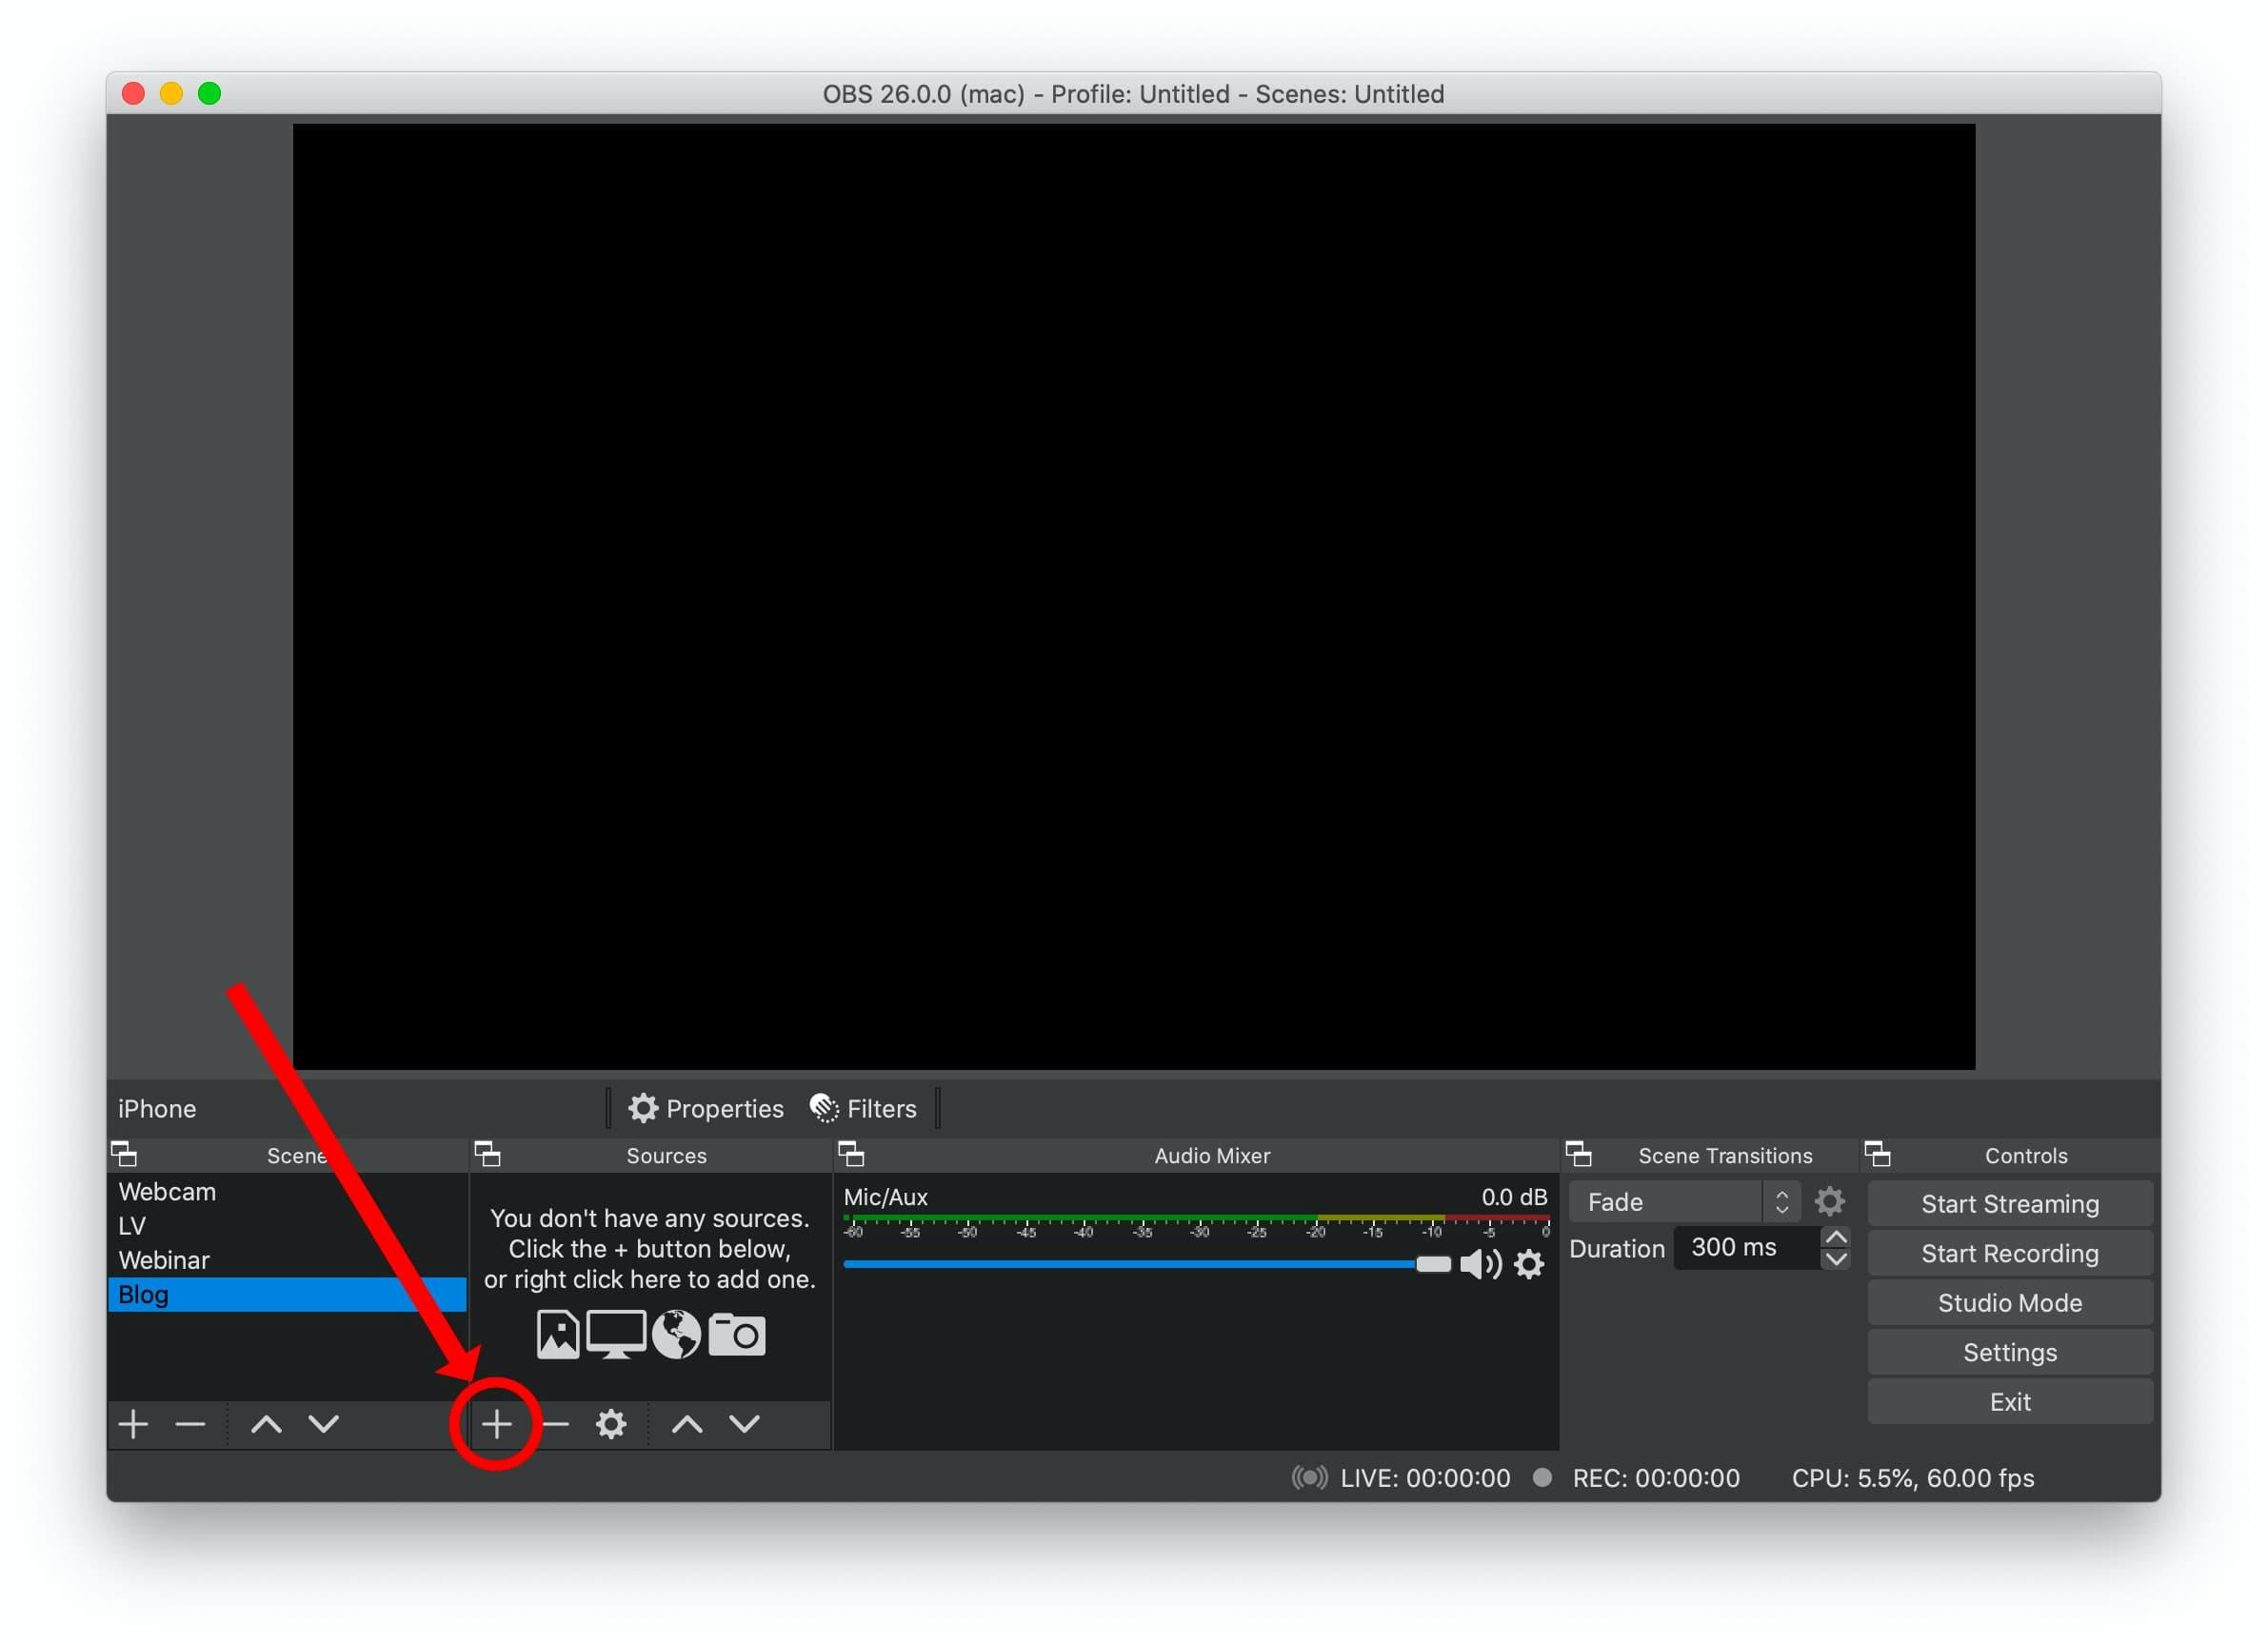
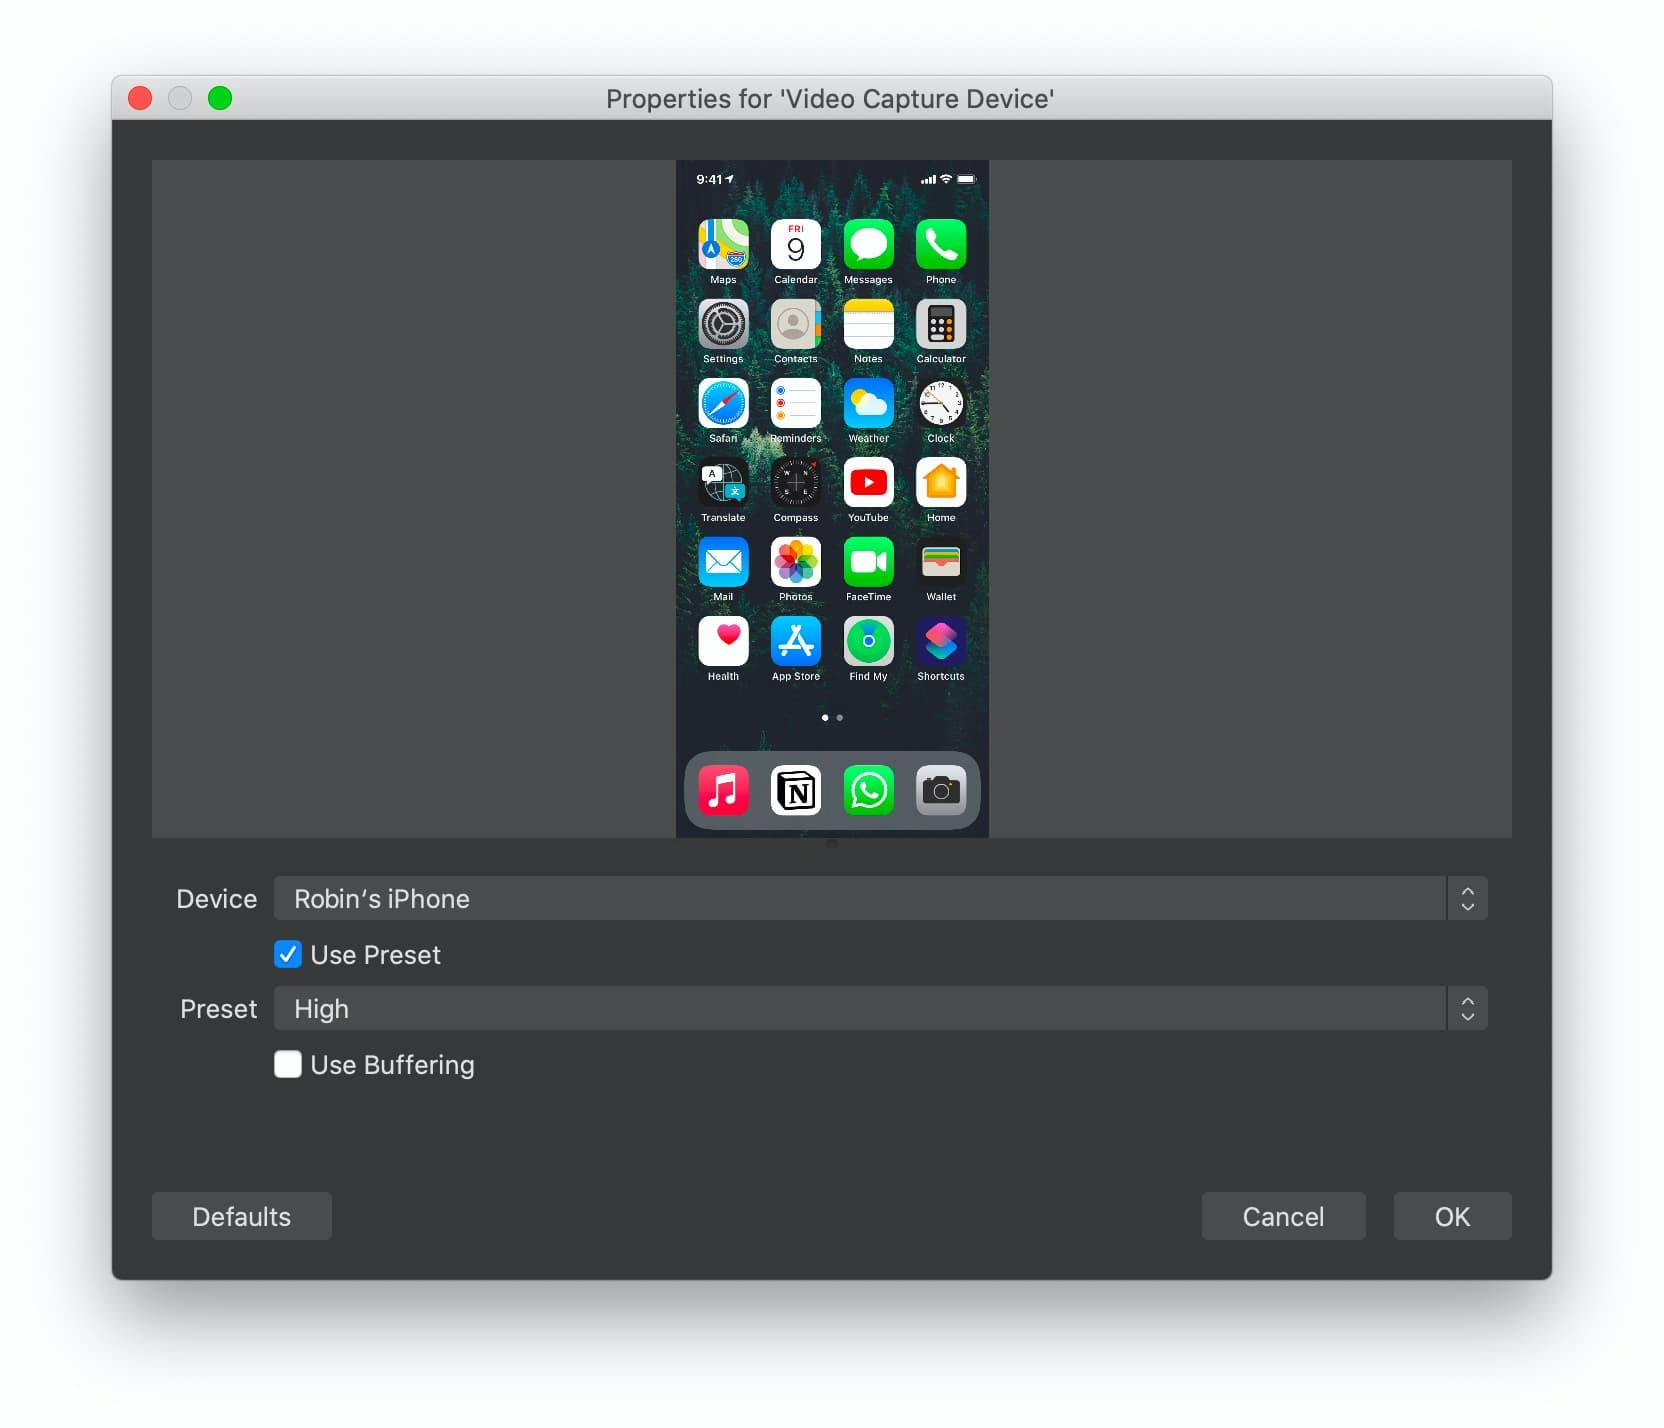
Make sure that your iPhone is connected to your Mac via USB or else it won't show up in the Device dropdown. Select your iPhone and make sure to choose High from the Preset dropdown to ensure the best possible output quality.
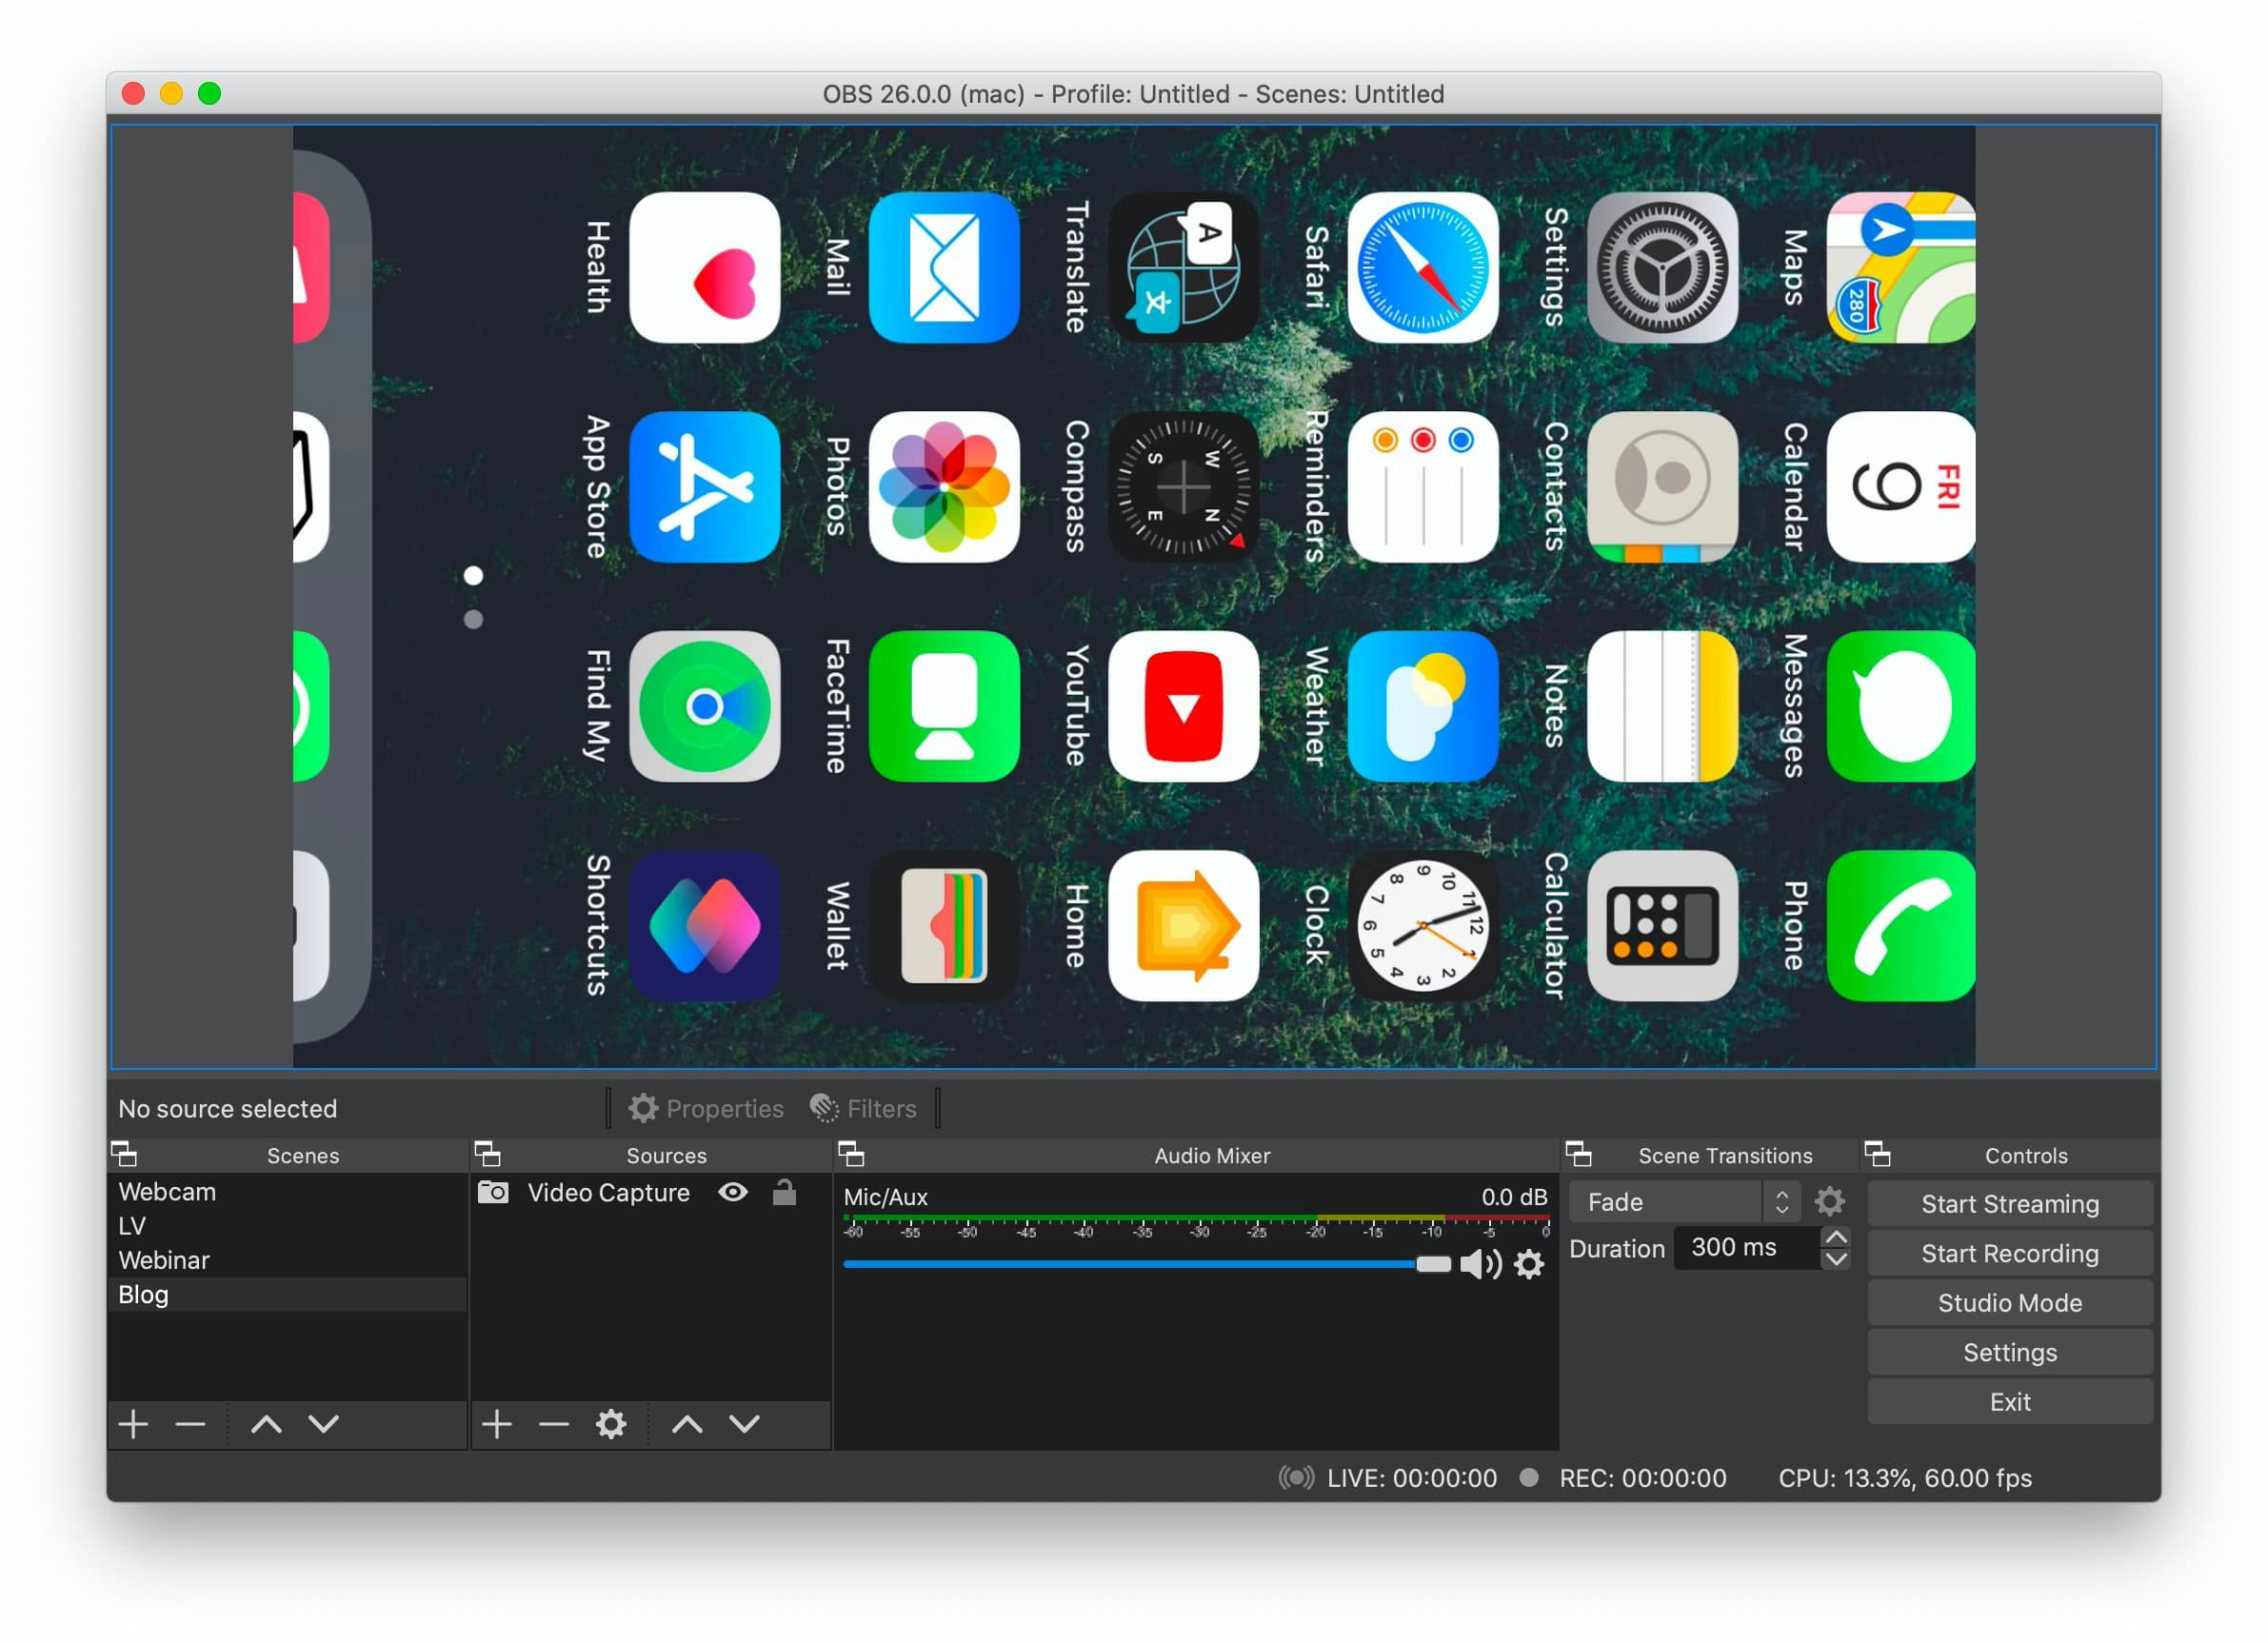
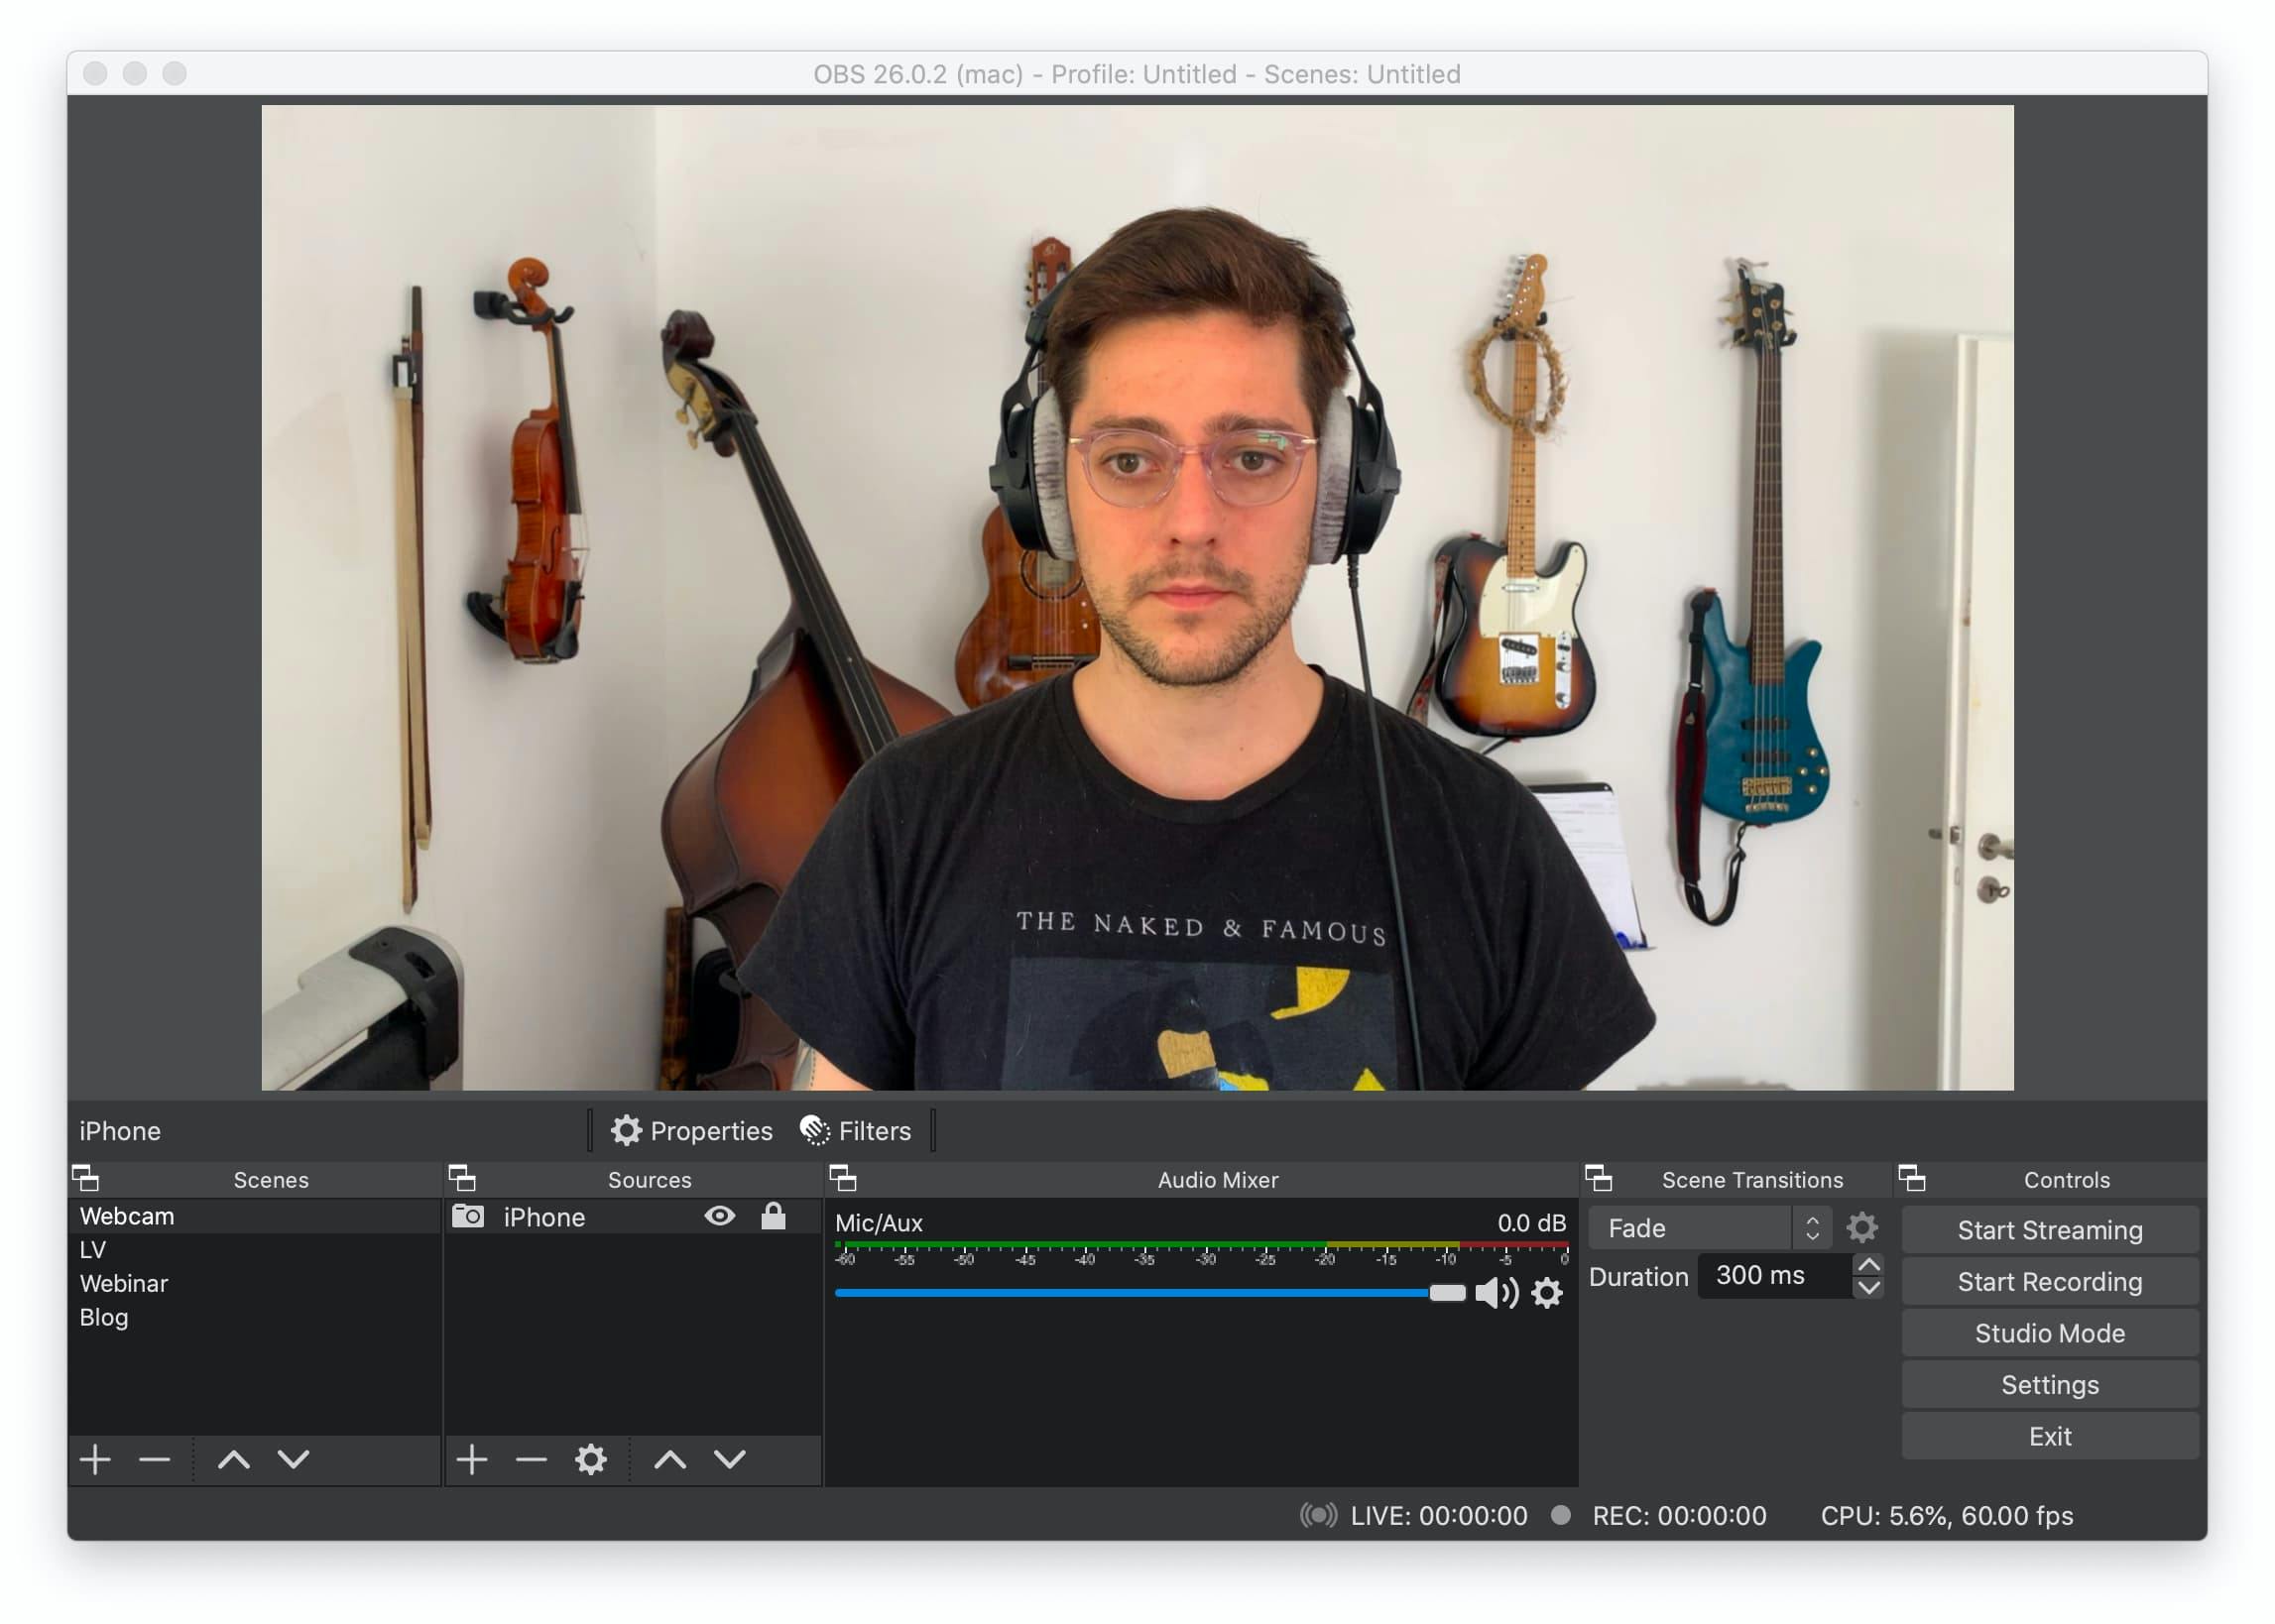
You should now be able to see your iPhone screen inside the scene preview. Next, we want to rotate and center it so that it fills the preview. Right-click on the source and navigate to Transform. Here we'll be able to do all kinds of manipulations.
I usually start with Fit to screen followed by Rotate 90 degrees CW.
Then I use the cropping tools to scale my screen all the way up until it fully covers the preview box.
Note: We need to cut some pixels on both ends in order to make it fit the box.
In the end it should look something like this:
Don't worry about the details right away, because we'll need to adjust the screen once again anyways.
Virtual Cam
We can now see our phone screen in OBS, but we can't use it as a webcam just yet.
To achieve that, we need to somehow export our video output as a virtual cam for apps to recognize it as an actual webcam.
Luckily, there's an OBS plugin called obs-mac-virtualcam which does exactly that.
Jump over to the Releases section and download the latest .pkg installer.
Once installed, you should see a Start Virtual Cam option under Tools in the OBS menubar.
Start the virtual cam and your OBS scene is now available as an external webcam!
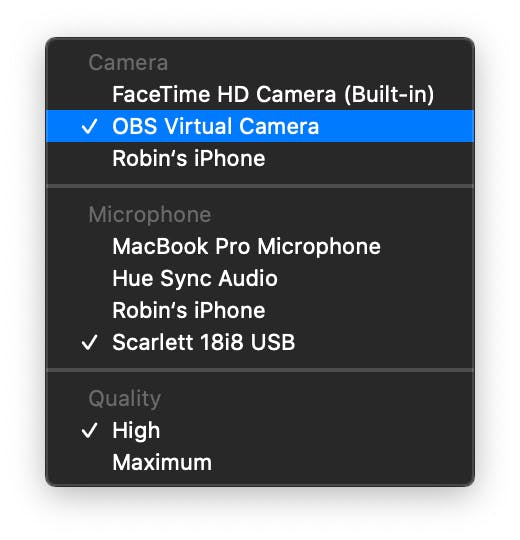
Let's test it: Head over to QuickTime Player and try File > New Movie Recording and you should be able to select your OBS Virtual Cam right next to the "Record"-button.
If there's no OBS Virtual Cam option, something went wrong in the setup process. Maybe restart OBS or try a clean setup once again.
iPhone Setup
We can see our iPhone screen in OBS, but it's not really a good webcam quite yet.
We could open the native camera app, to get the camera input. But, since OBS just mirrors the phone screen, you'll quickly find that there's a lot of distracting UI which we'd have to crop in order to get a real webcam feeling.
So, ideally we'd want a "camera" app that has little or no UI.
There are plenty of options in the App Store, but I found an app which I personally like a lot: ShutterCast.
It has no UI elements and we only need to crop away some padding on both ends.
A free alternative is Instagram's Hyperlapse which comes with a very minimal UI.
Once the camera app of your choice is active, go over to OBS and manipulate the scene until it nicely fits all edges.
Tip: I use a flexible camera stand which is attached to my desk and sits behind my external display.
That way I can adjust my desk height without having to readjust the phone stand every time.
App Support
Alright, now we are all setup with OBS and got a nice webcam output. One might think we're already done at that point, but it turns out to be way more complicated. Most apps won't initially support or even recognize the virtual cam and the reason is Apple's security policy: The operating system is not allowing any libraries not signed by the same App ID.
So what we ultimately need to do, is resigning our apps with our own certificates.
Warning! Resigning applications actively disables security mechanisms that are there for a reason. I take no responsibility from here on. Try it at your own risk.
Code Signing
In order to be able to use the codesign CLI, Xcode including its Command Line Tools need to be installed on your machine.
Generating a Apple Developer certificate
Before we're able to sign apps, we need our own Apple Developer certificate.
If you have a paid Apple Developer account, you should be able to skip this part entirely.
Note: This does NOT require a paid Apple Developer account.
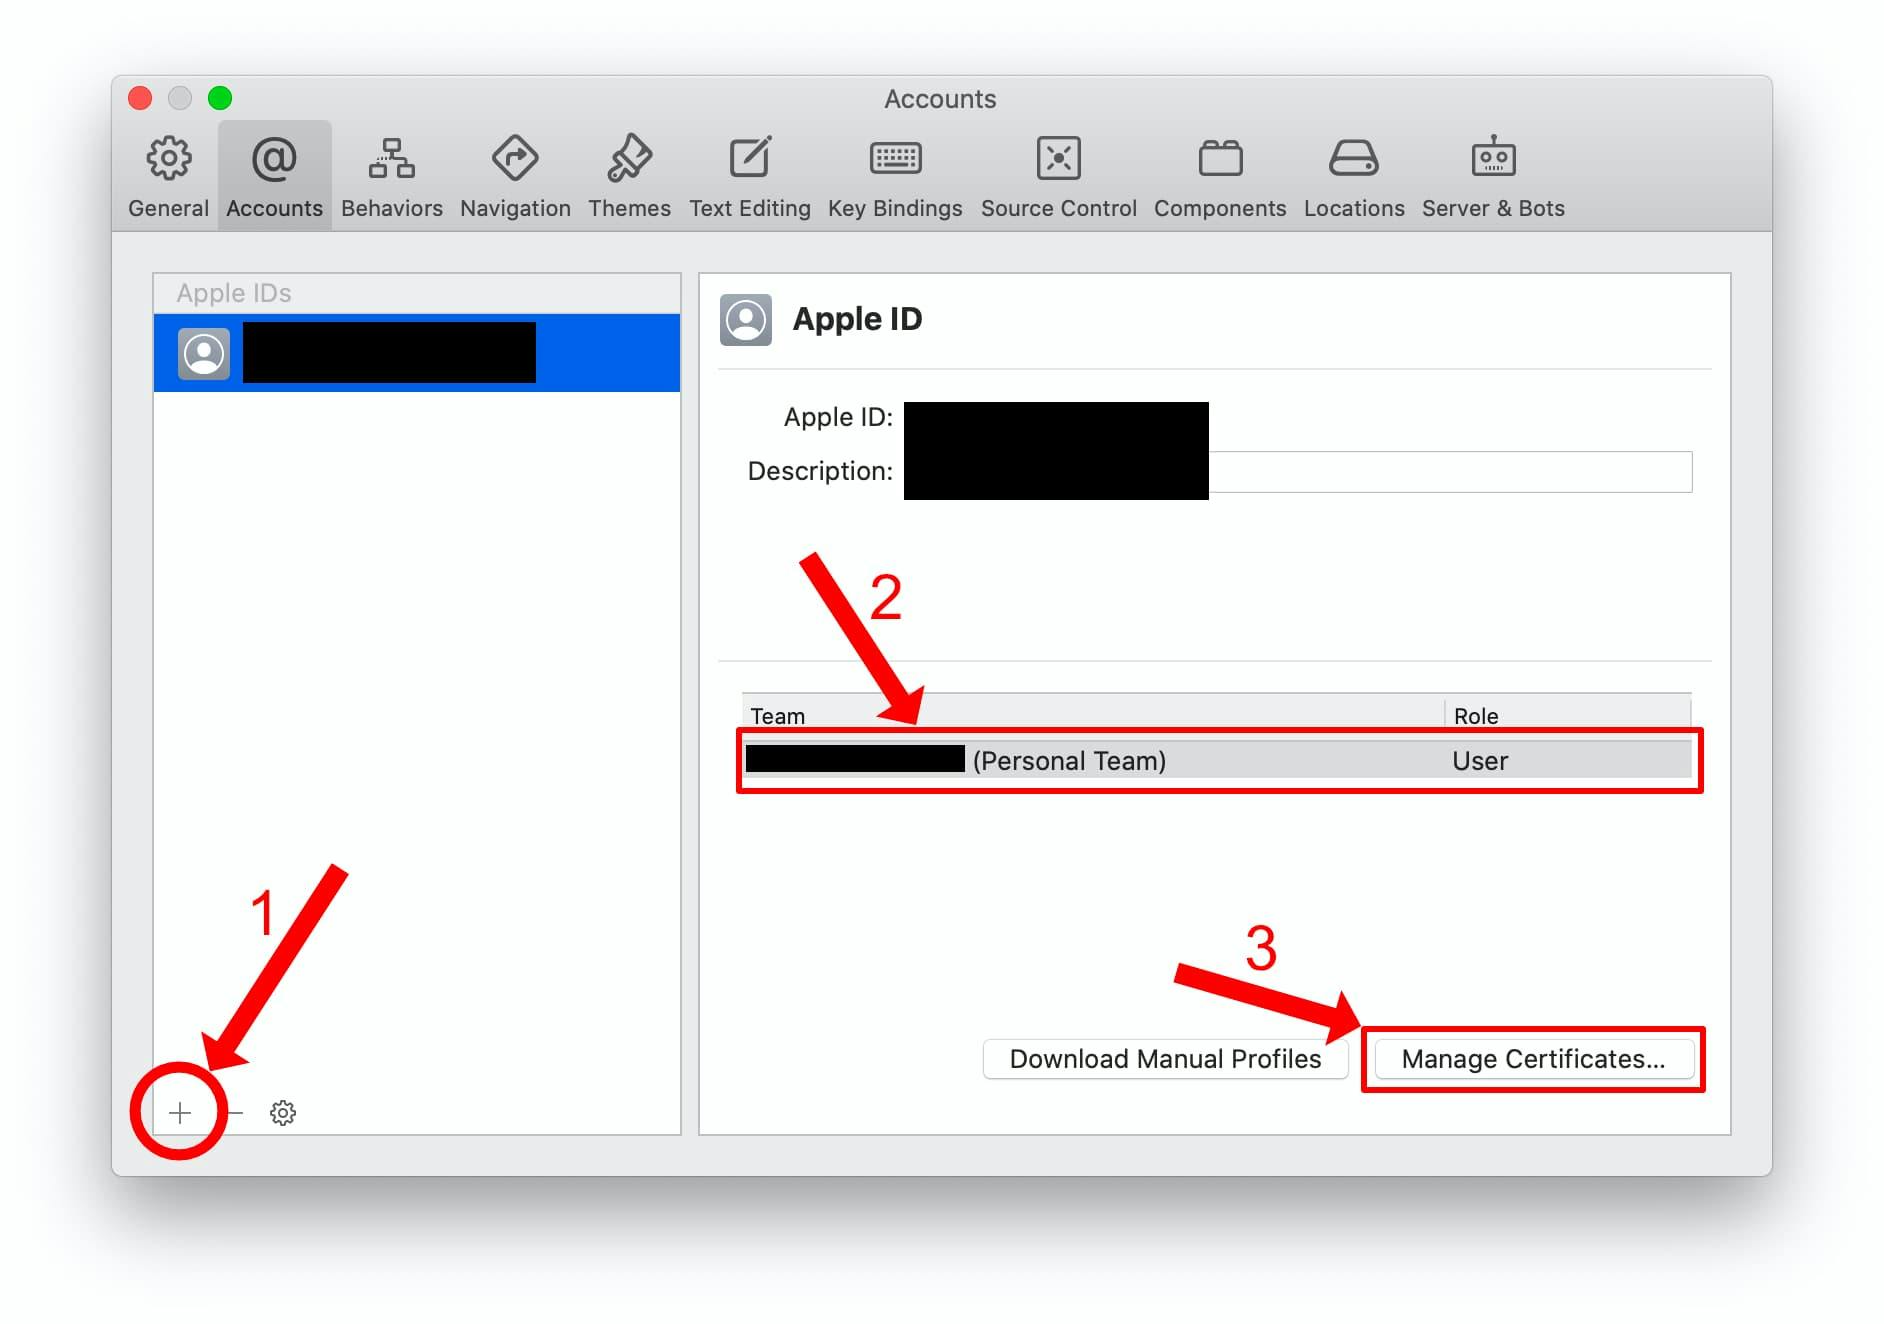
Open Xcode and navigate to File > Preferences in the menubar.
Select the "Account" tab and follow these steps:
- Add your Apple ID if not already present.
- Select your Personal Team in the Teams table.
- Click the "Manage Certificates..." button in the bottom right corner.
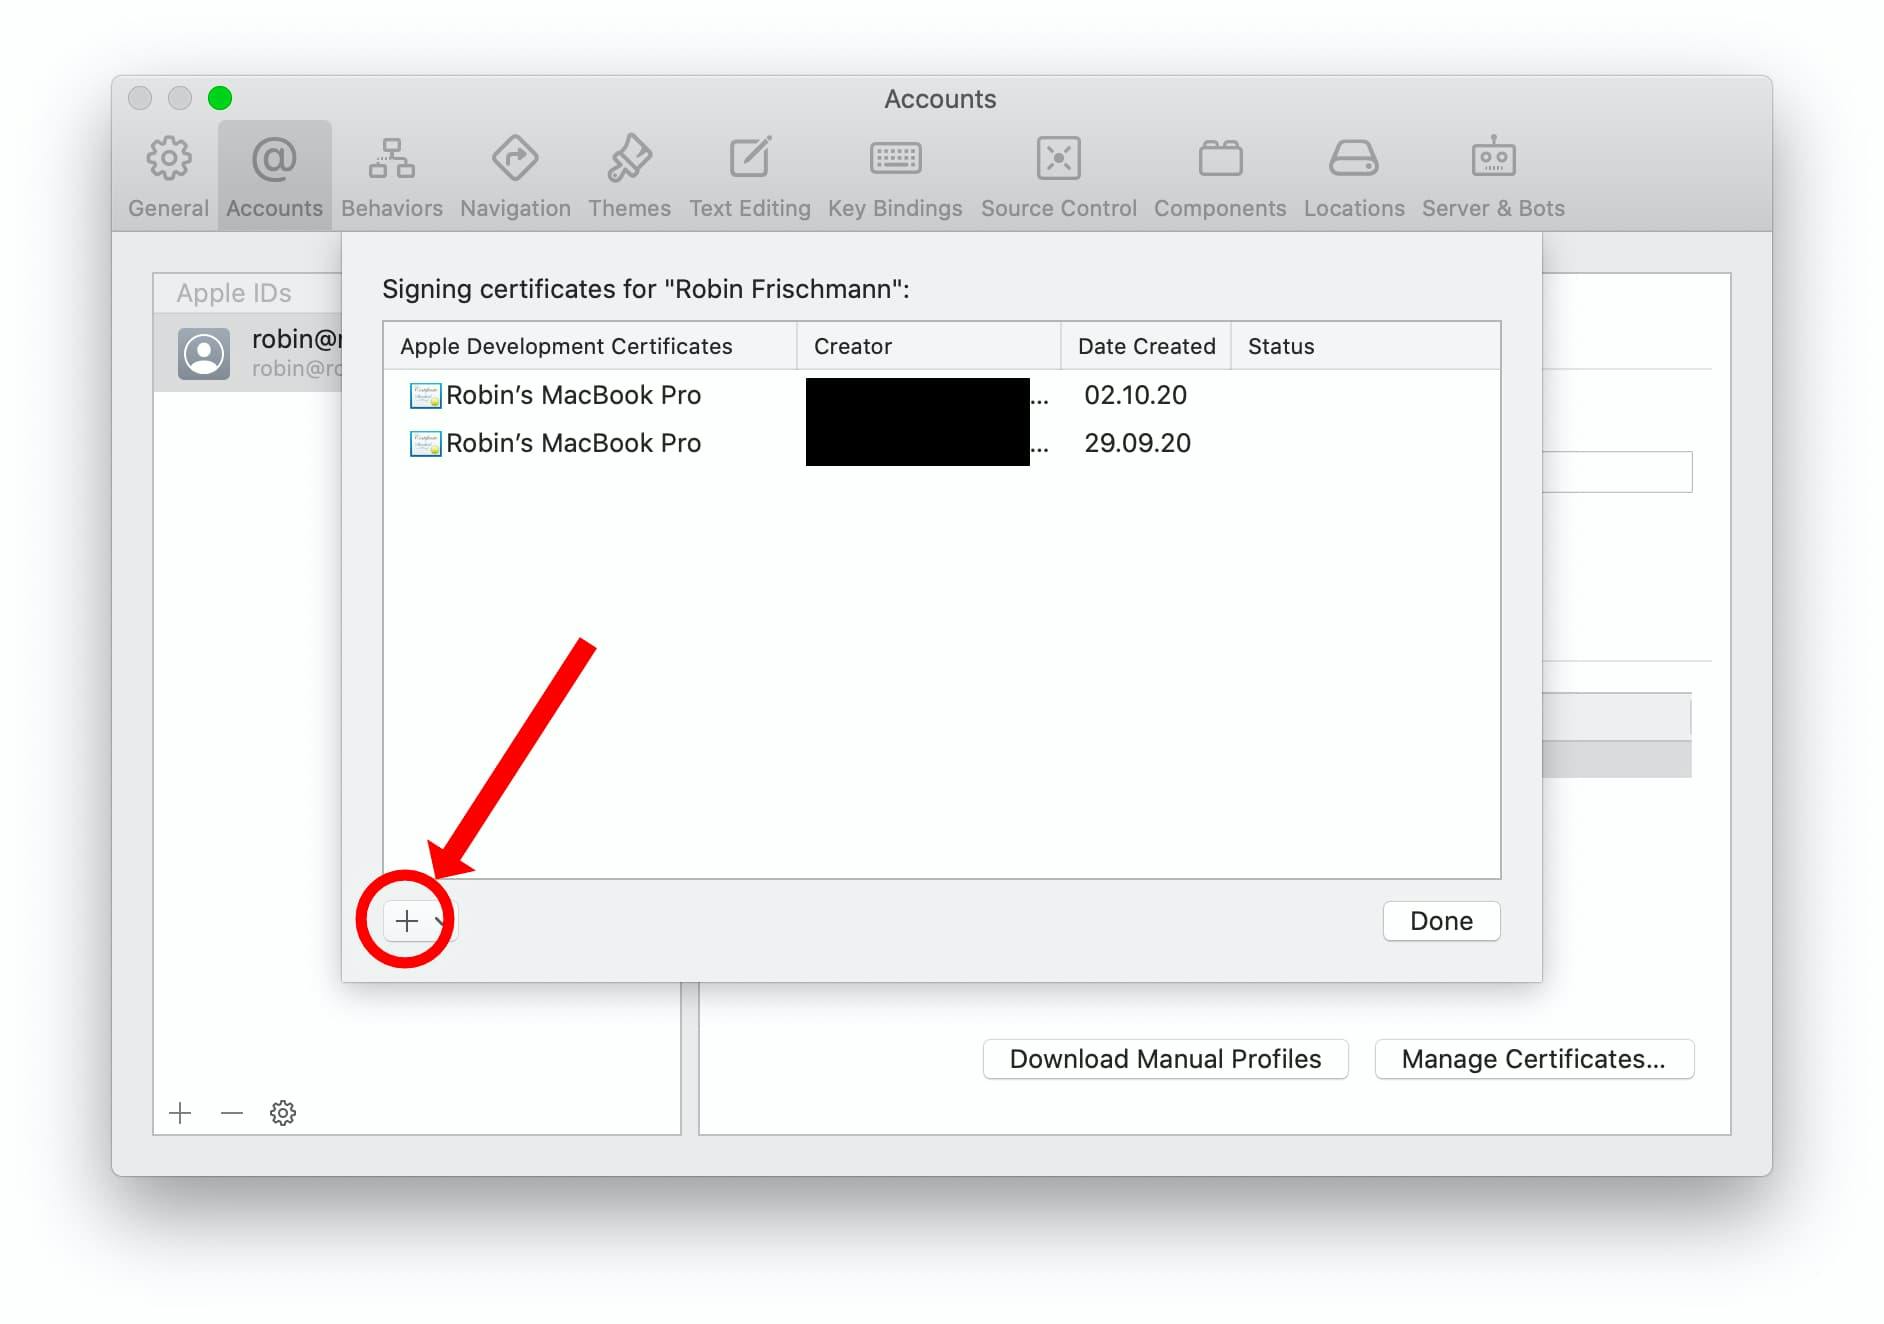
If there's no certificate present already, go ahead and create a new Apple Development certificate.
Last but not least, we need to get the full title of the certificate we just created.
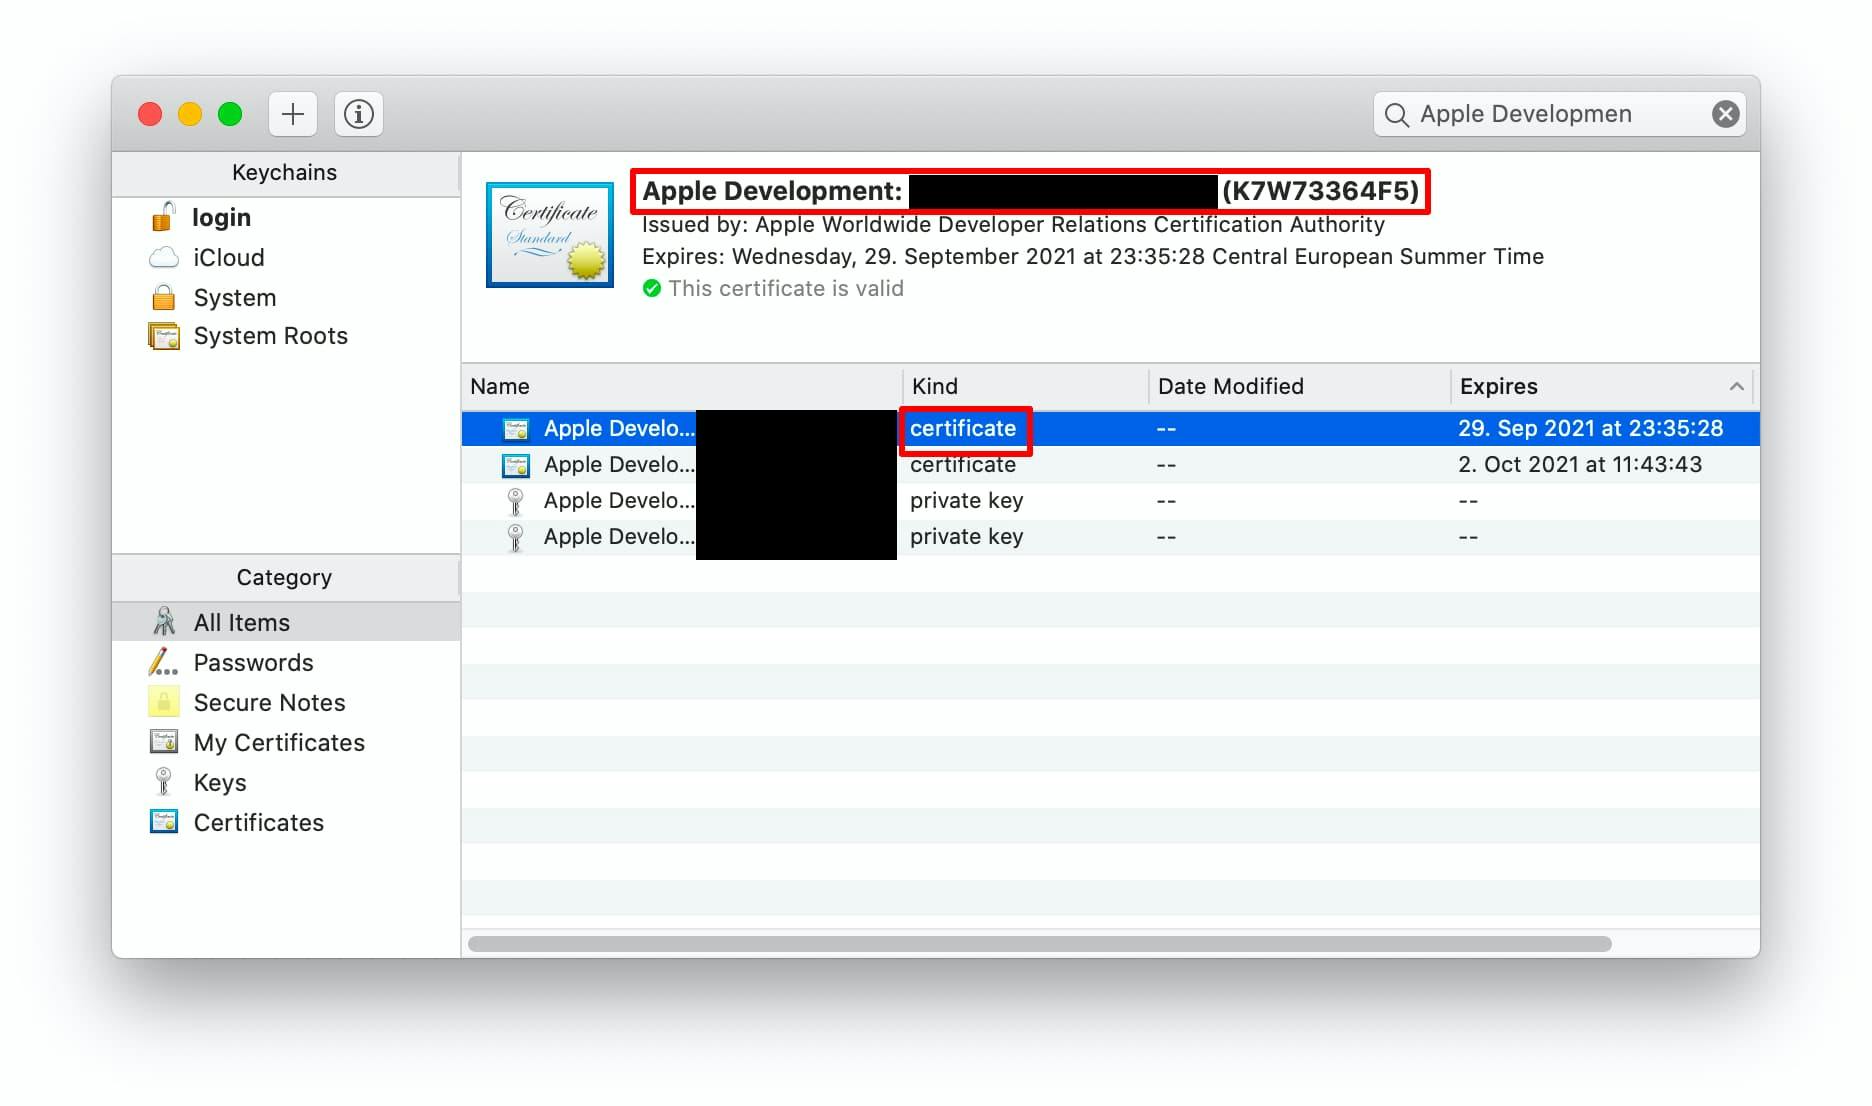
- Open the Keychain Access app and search for Apple Development.
- Select the latest with type certificate and copy the full title.
e.g.Apple Development: foo@bar.com (ABCD123) - Safe it or check back later since we'll need it for some specific apps.
Now we should be all setup to finally start signing our apps and see some results!
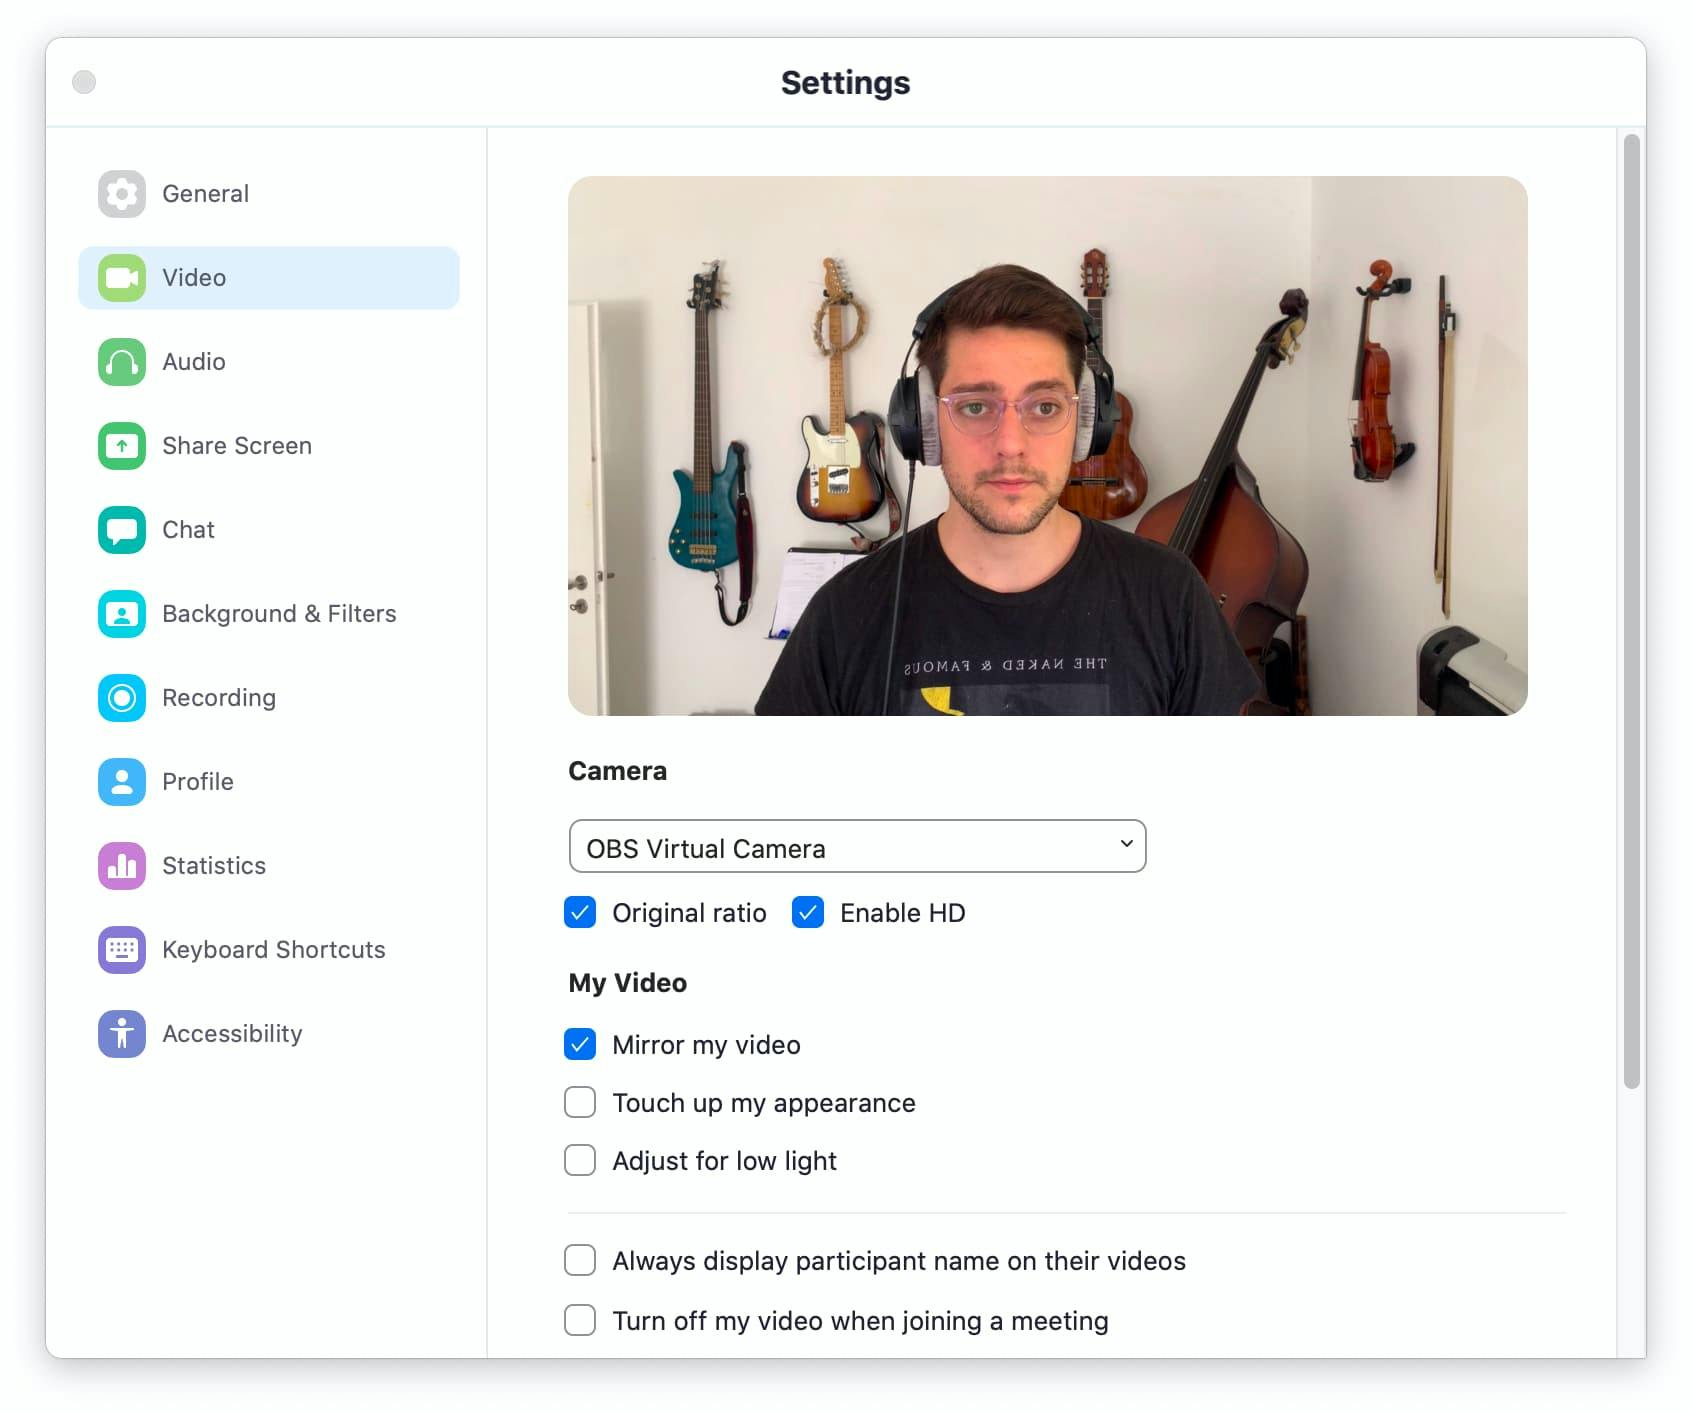
Zoom
Edit: The latest version of Zoom now officially supports third-party virtual cameras, so we shouldn't need to sign it anymore.
Zoom can be signed with a single command:
sudo codesign -dv "/Applications/zoom.us.app"
Et voilà, we can now select our OBS Virtual Cam in the video settings!
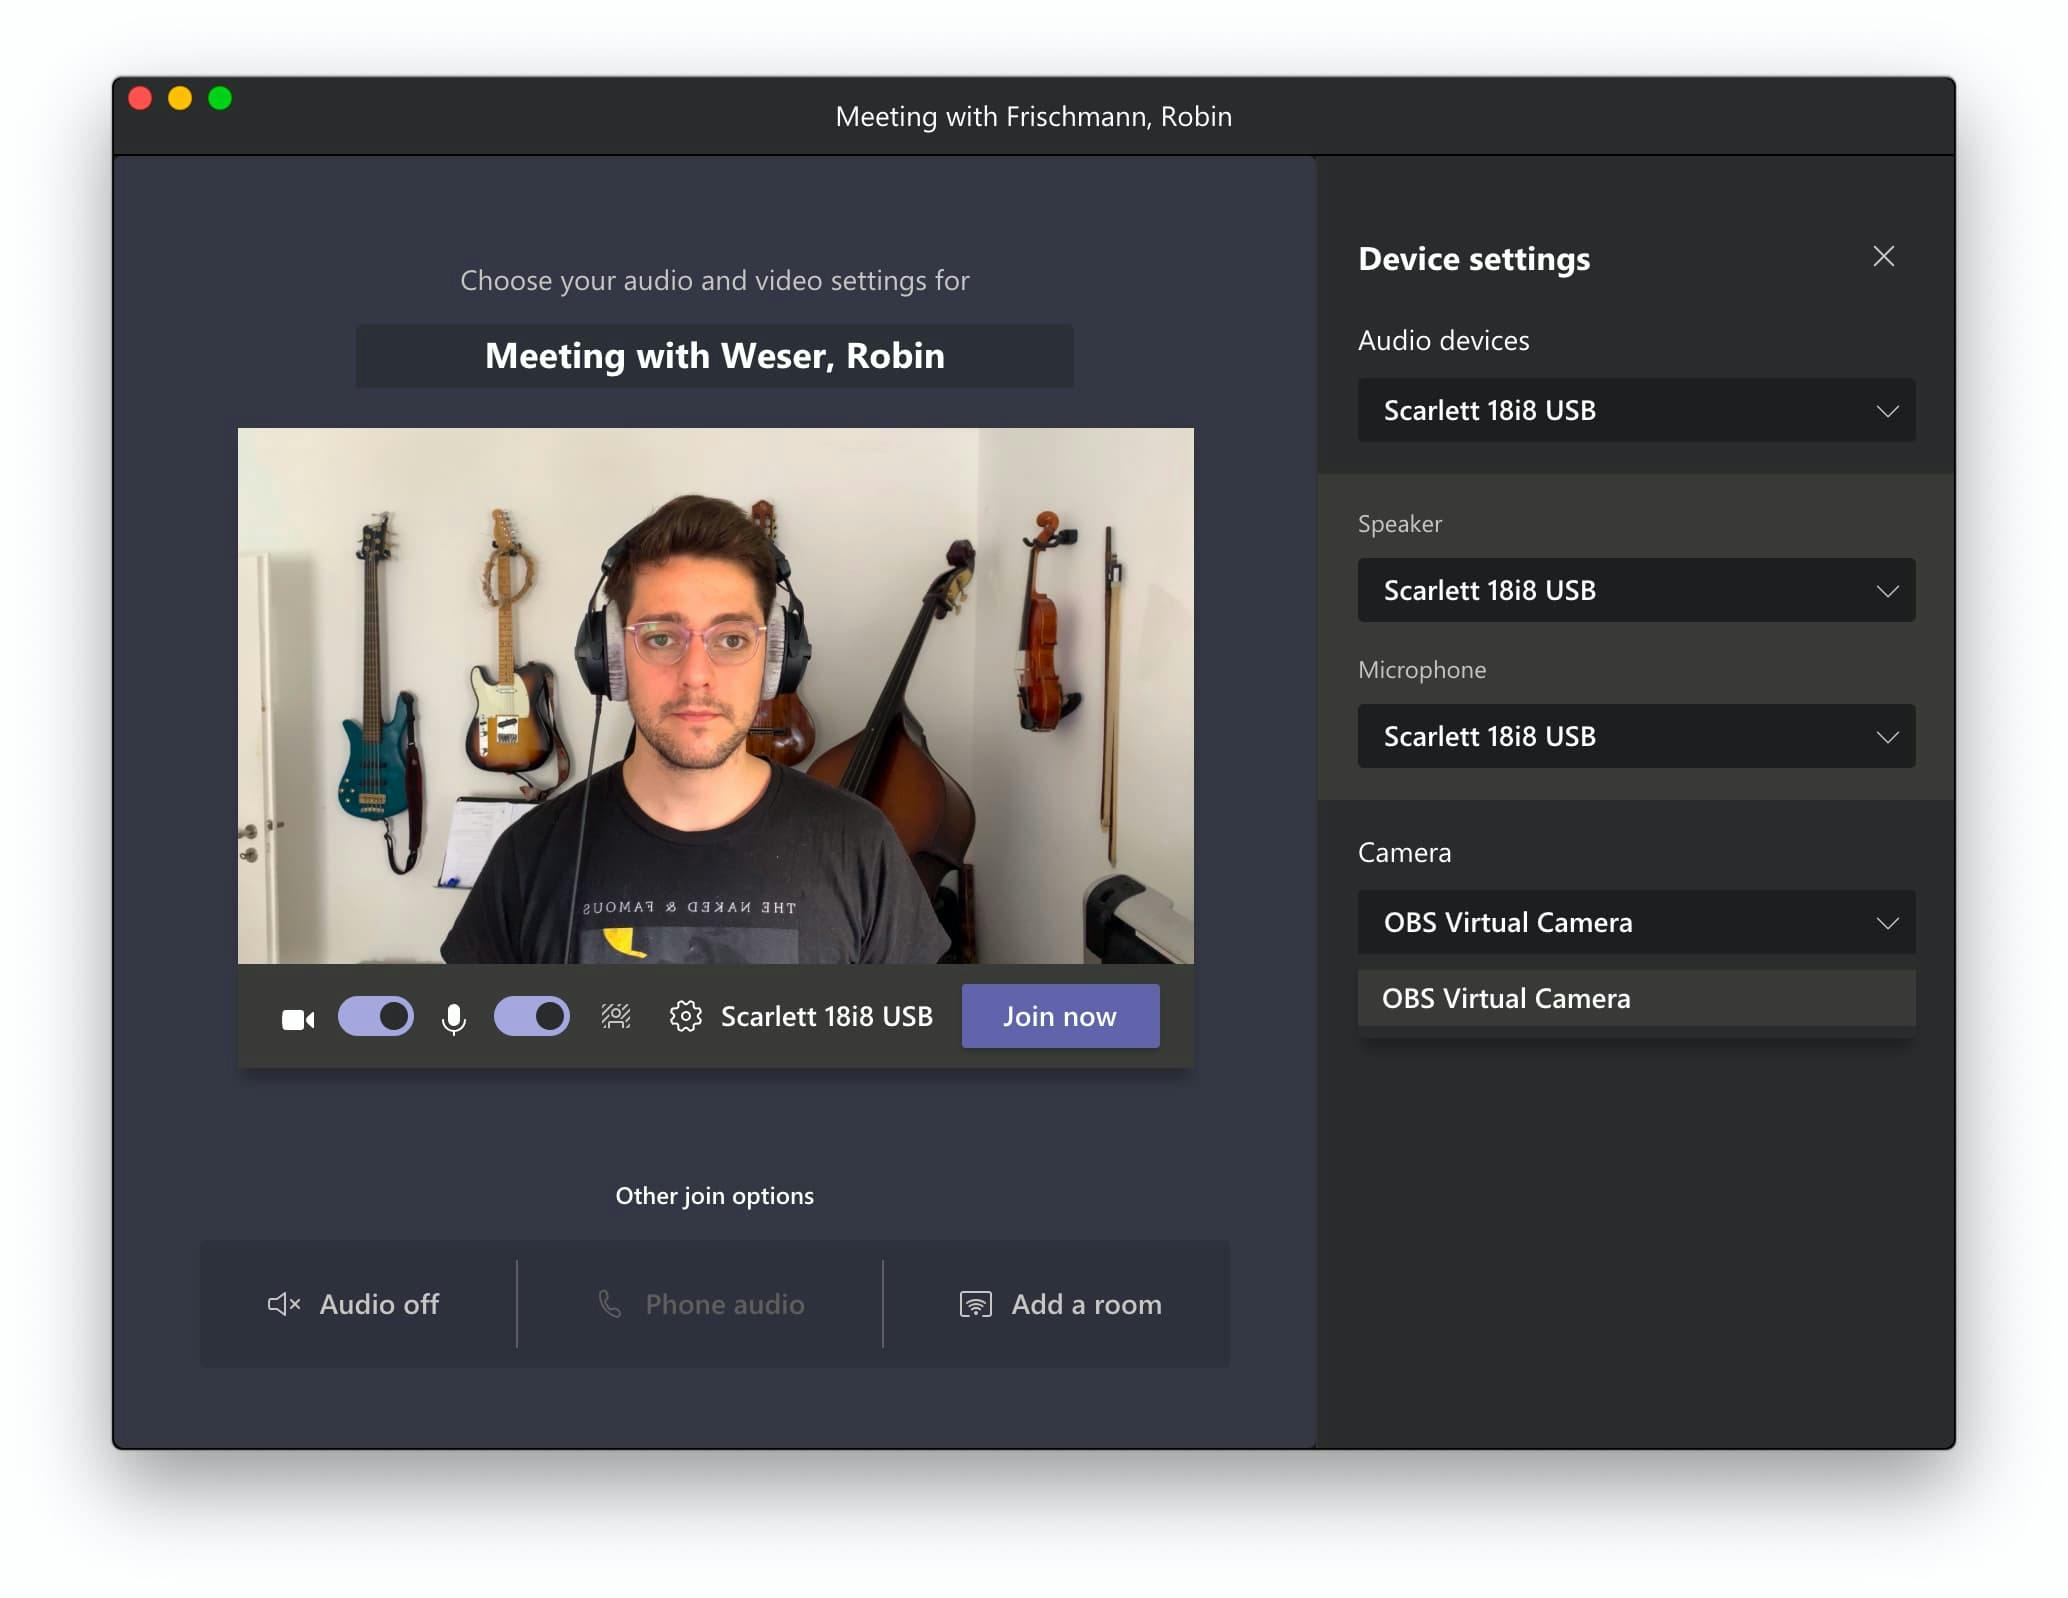
Teams
Microsoft Teams is similarly easy, although we need to sign both the actual Microsoft Teams.app as well as its Helper.app which runs in the background.
sudo codesign --remove-signature "/Applications/Microsoft Teams.app"
sudo codesign --remove-signature "/Applications/Microsoft Teams.app/Contents/Frameworks/Microsoft Teams Helper.app"
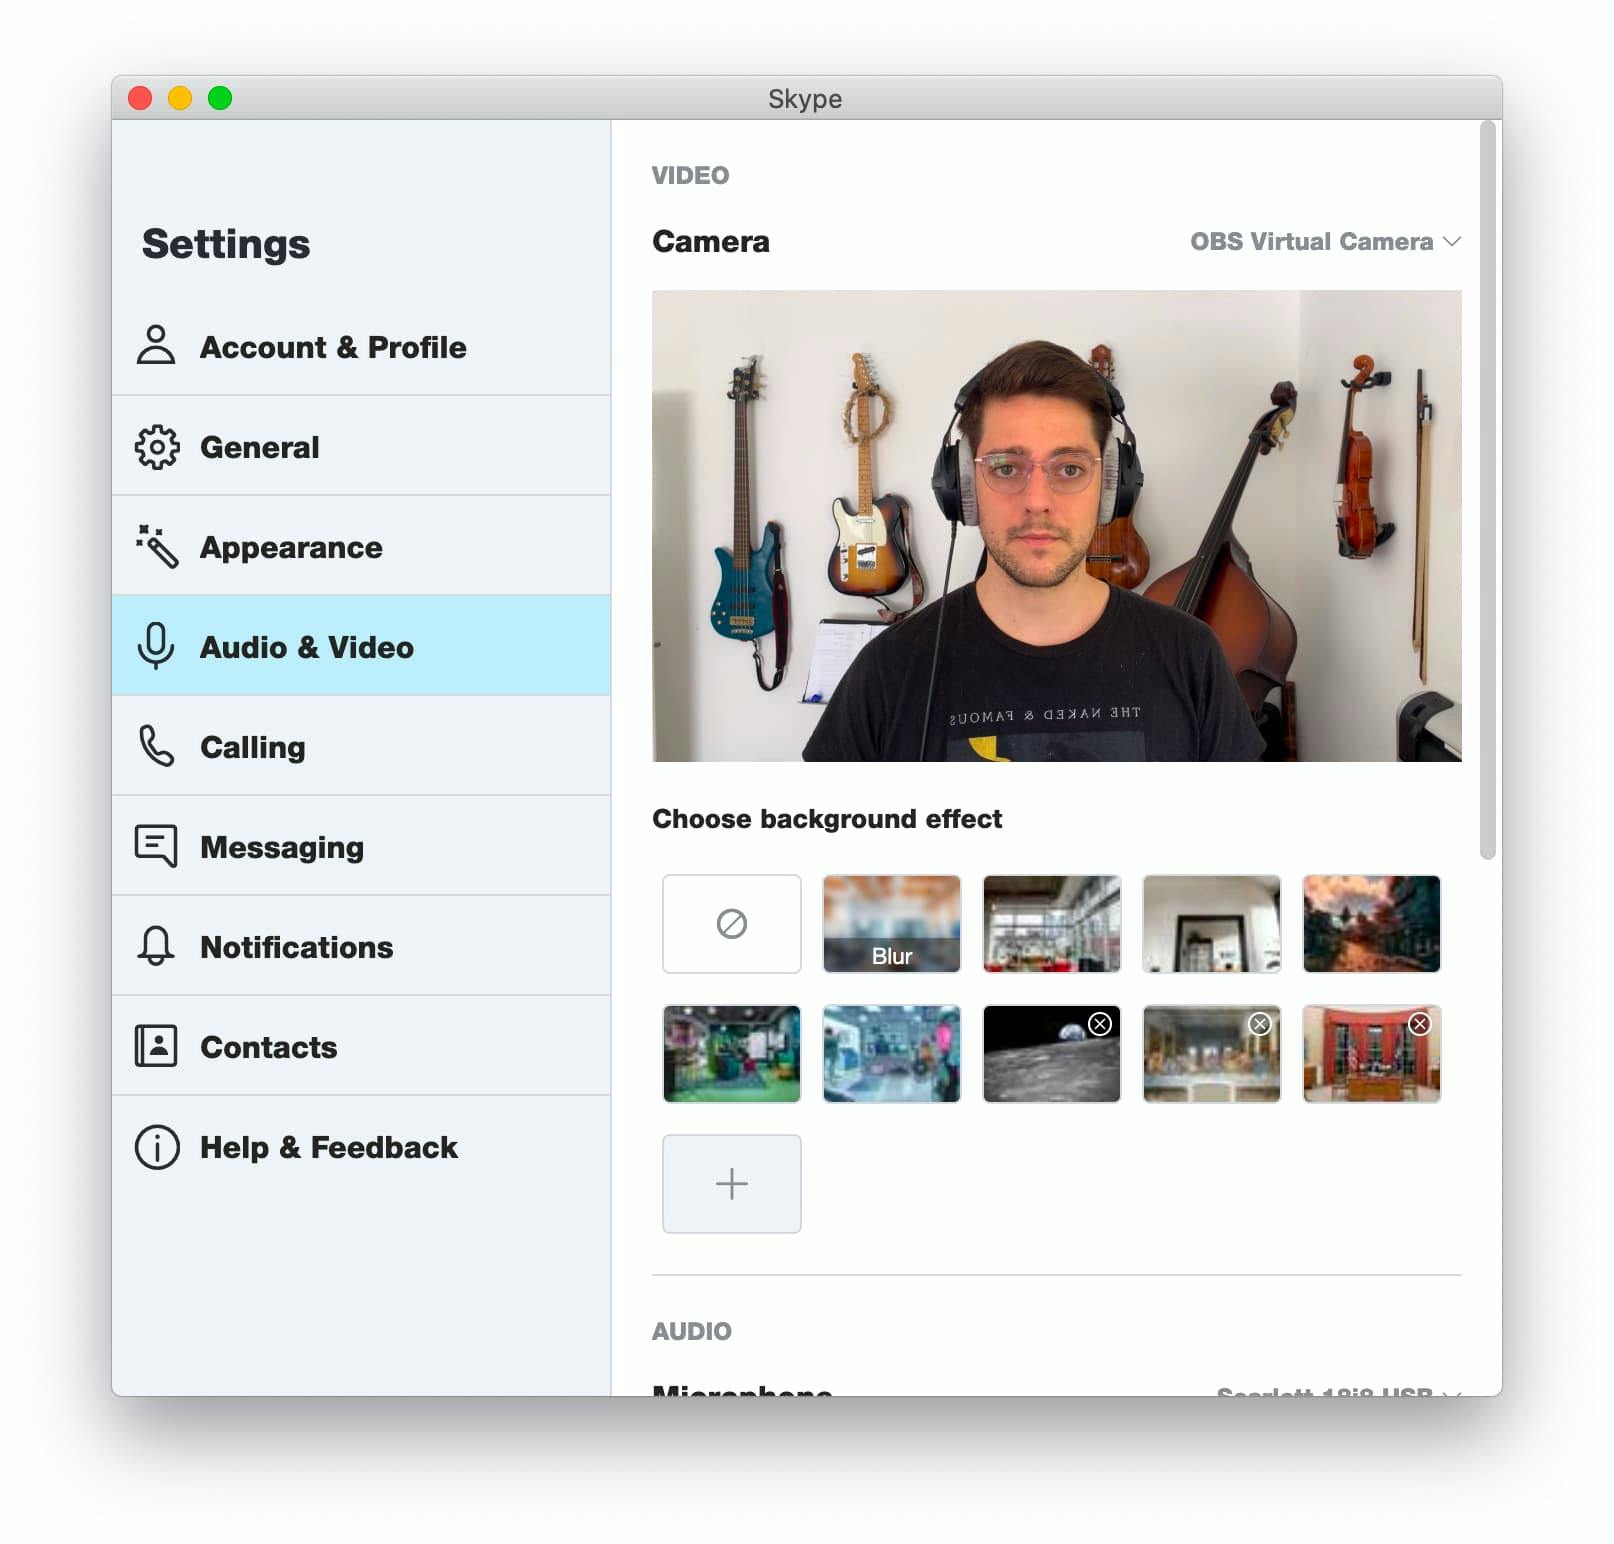
Skype
Same company, same procedure.
Skype also has a Helper.app which needs to be signed as well.
sudo codesign -f -s - "/Applications/Skype.app"
sudo codesign --remove-signature "/Applications/Skype.app/Contents/Frameworks/Skype Helper (Renderer).app"
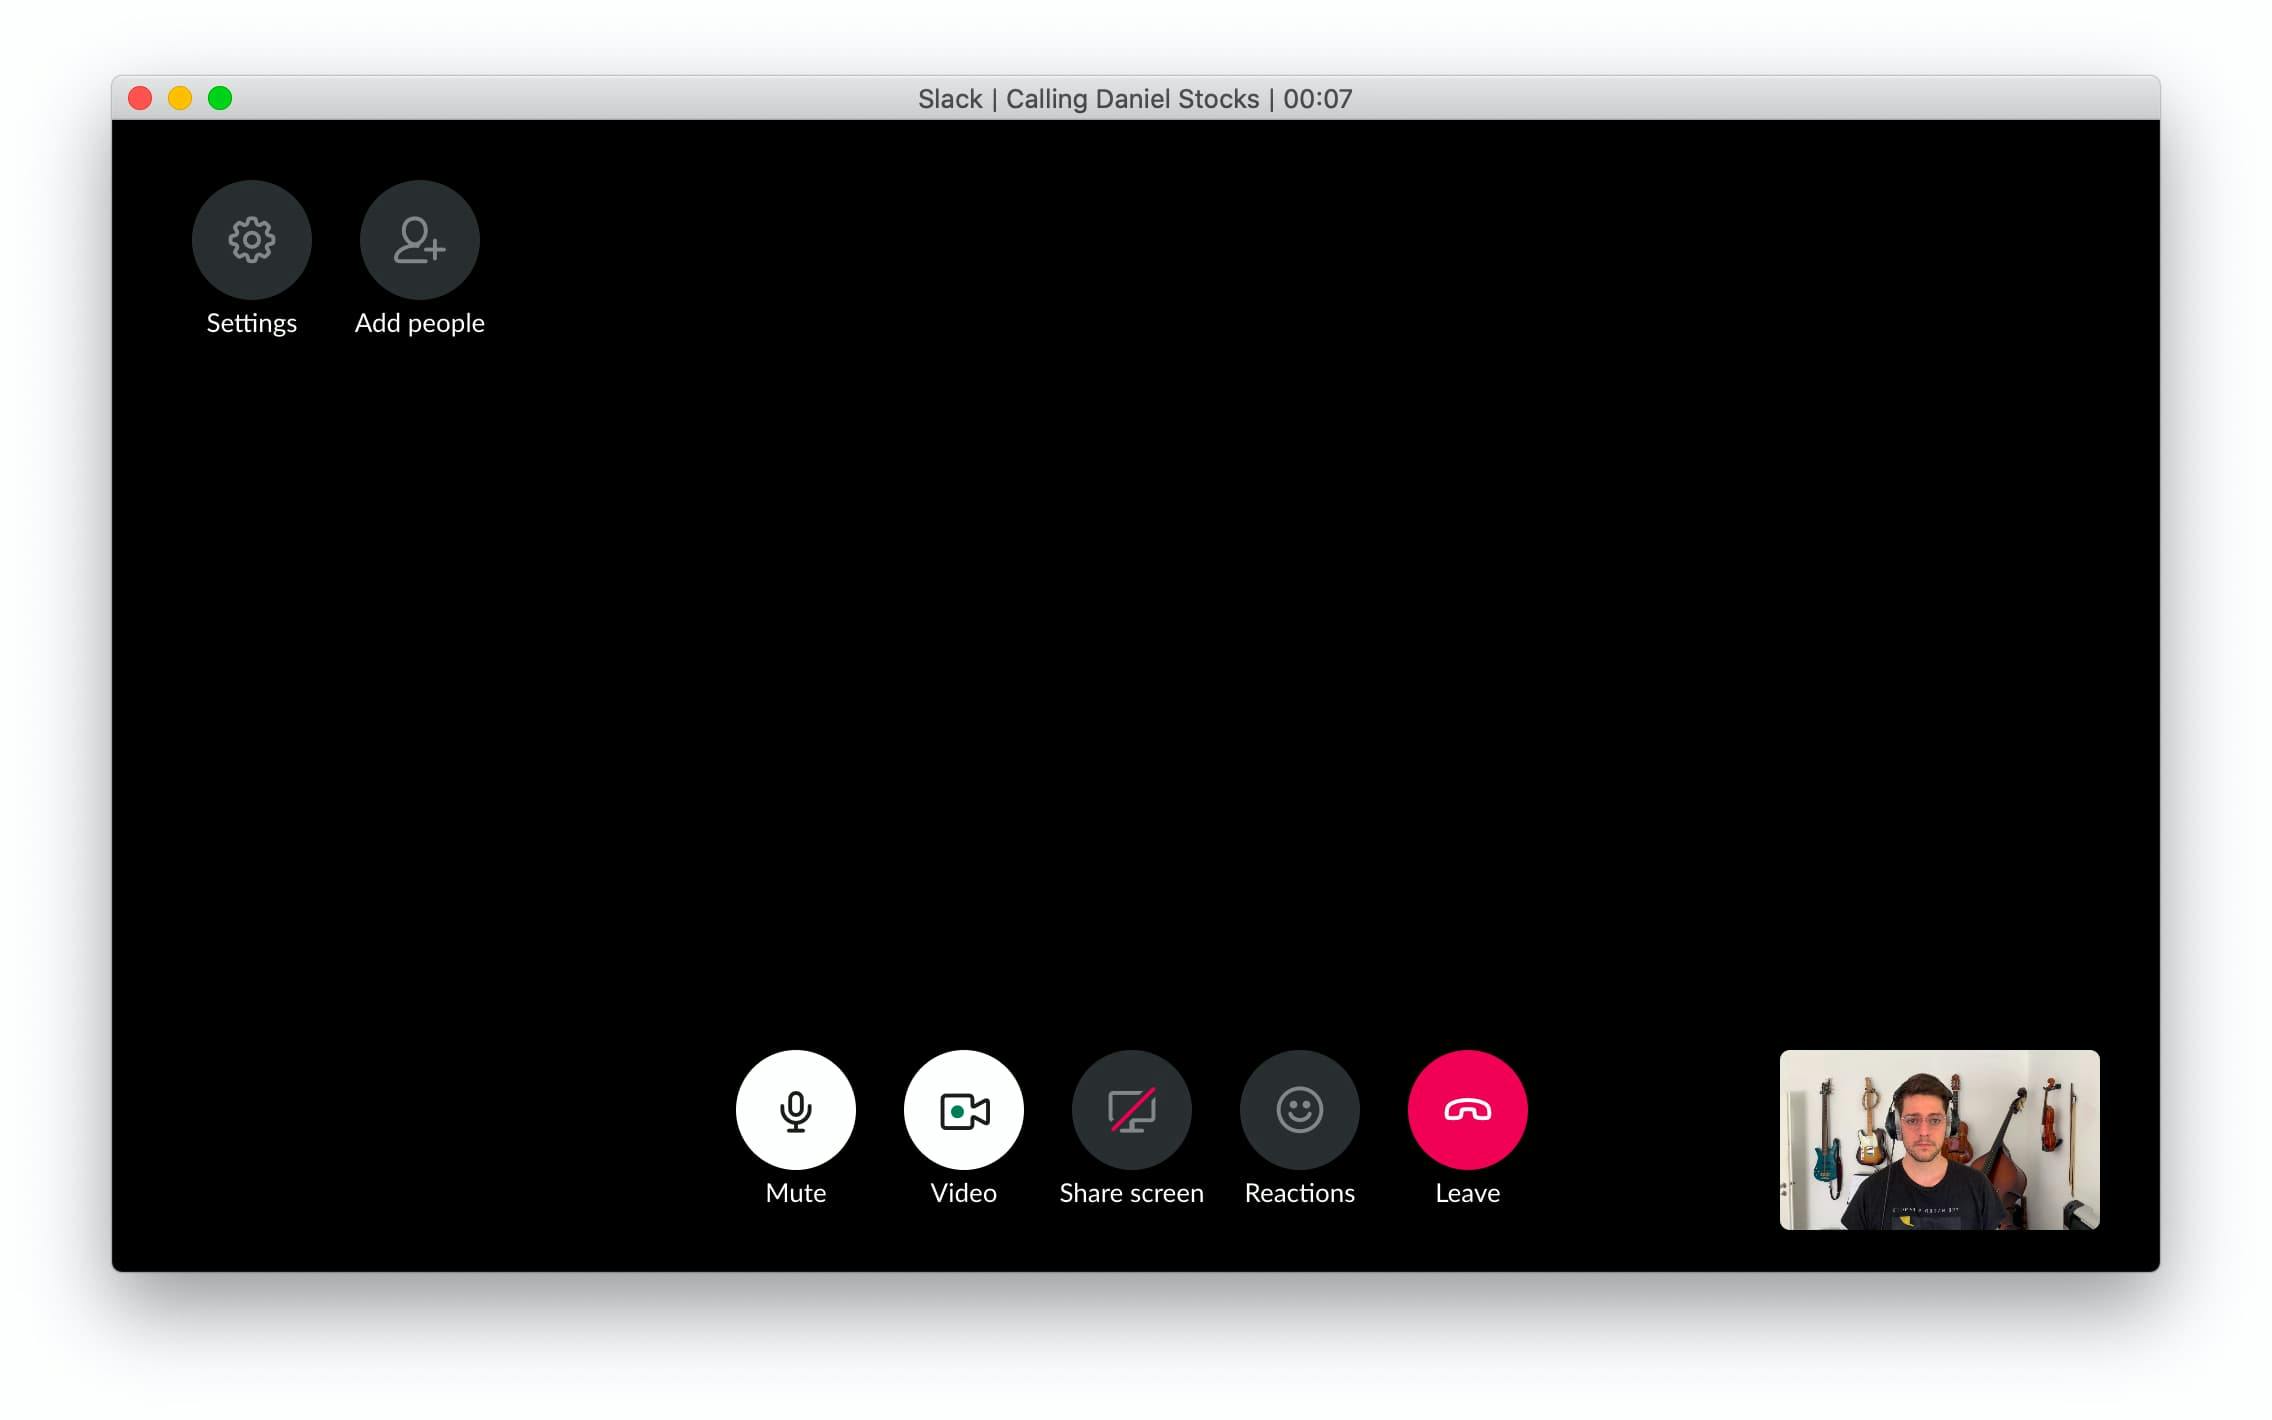
Slack
Trying to codesign Slack the same way as the other apps above, I ran into some issues. Slack is based on Electron and thus needs additional steps.
I came across electron-osx-sign which is a wrapper around the codesign CLI specifically built for signing Electron-based apps.
One can install it with npm running:
npm install -g electron-osx-sign
If you do not have Node.js/npm installed on your machine already, go ahead and get the latest version.
Additionally, we'll be using a minimal entitlements.xml file to sign those apps.
I created mine under /Users/USERNAME/ or respectively ~.
Let's create a new file ~/entitlements.xml:
<?xml version="1.0" encoding="UTF-8"?>

<!DOCTYPE plist PUBLIC "-//Apple//DTD PLIST 1.0//EN" "http://www.apple.com/DTDs/PropertyList-1.0.dtd">

<plist version="1.0">
  <dict>
    <key>com.apple.security.cs.disable-library-validation</key>
    <true />
  </dict>
</plist>
Now we can use the electron-osx-sign CLI to sign any Electron-based app.
Here's where we also need that certificate title which we already got earlier.
electron-osx-sign "/Applications/Slack.app" \
--type=development \
--entitlements="~/entitlements.xml" \
--gatekeeper-assess=false \
--identity="YOUR_CERTIFICATE_TITLE"
If you have a paid Apple Developer account, you can leave the --identity parameter as that should be pre-filled with your paid certificate automatically.
Other Electron-based Apps
If you're using other Electron-based messenger tools like e.g. Station or Franz, just replace the application name in the first line and you're ready to go!
Conclusion
With a little bit of extra work, we can now use our iPhone in every major meeting software!
While I usually disabled my video in the past, I'm nowadays almost looking forward to my next meeting just because I enjoy the setup that much 🤷♂️.
If you run into trouble, please let me know via Twitter and I'll try to update the article accordingly.
Credits
Thanks to my wife and to my friend and co-worker Daniel for reviewing this article.
Credits to Josh Spicer for his article which served as a basis for this post.